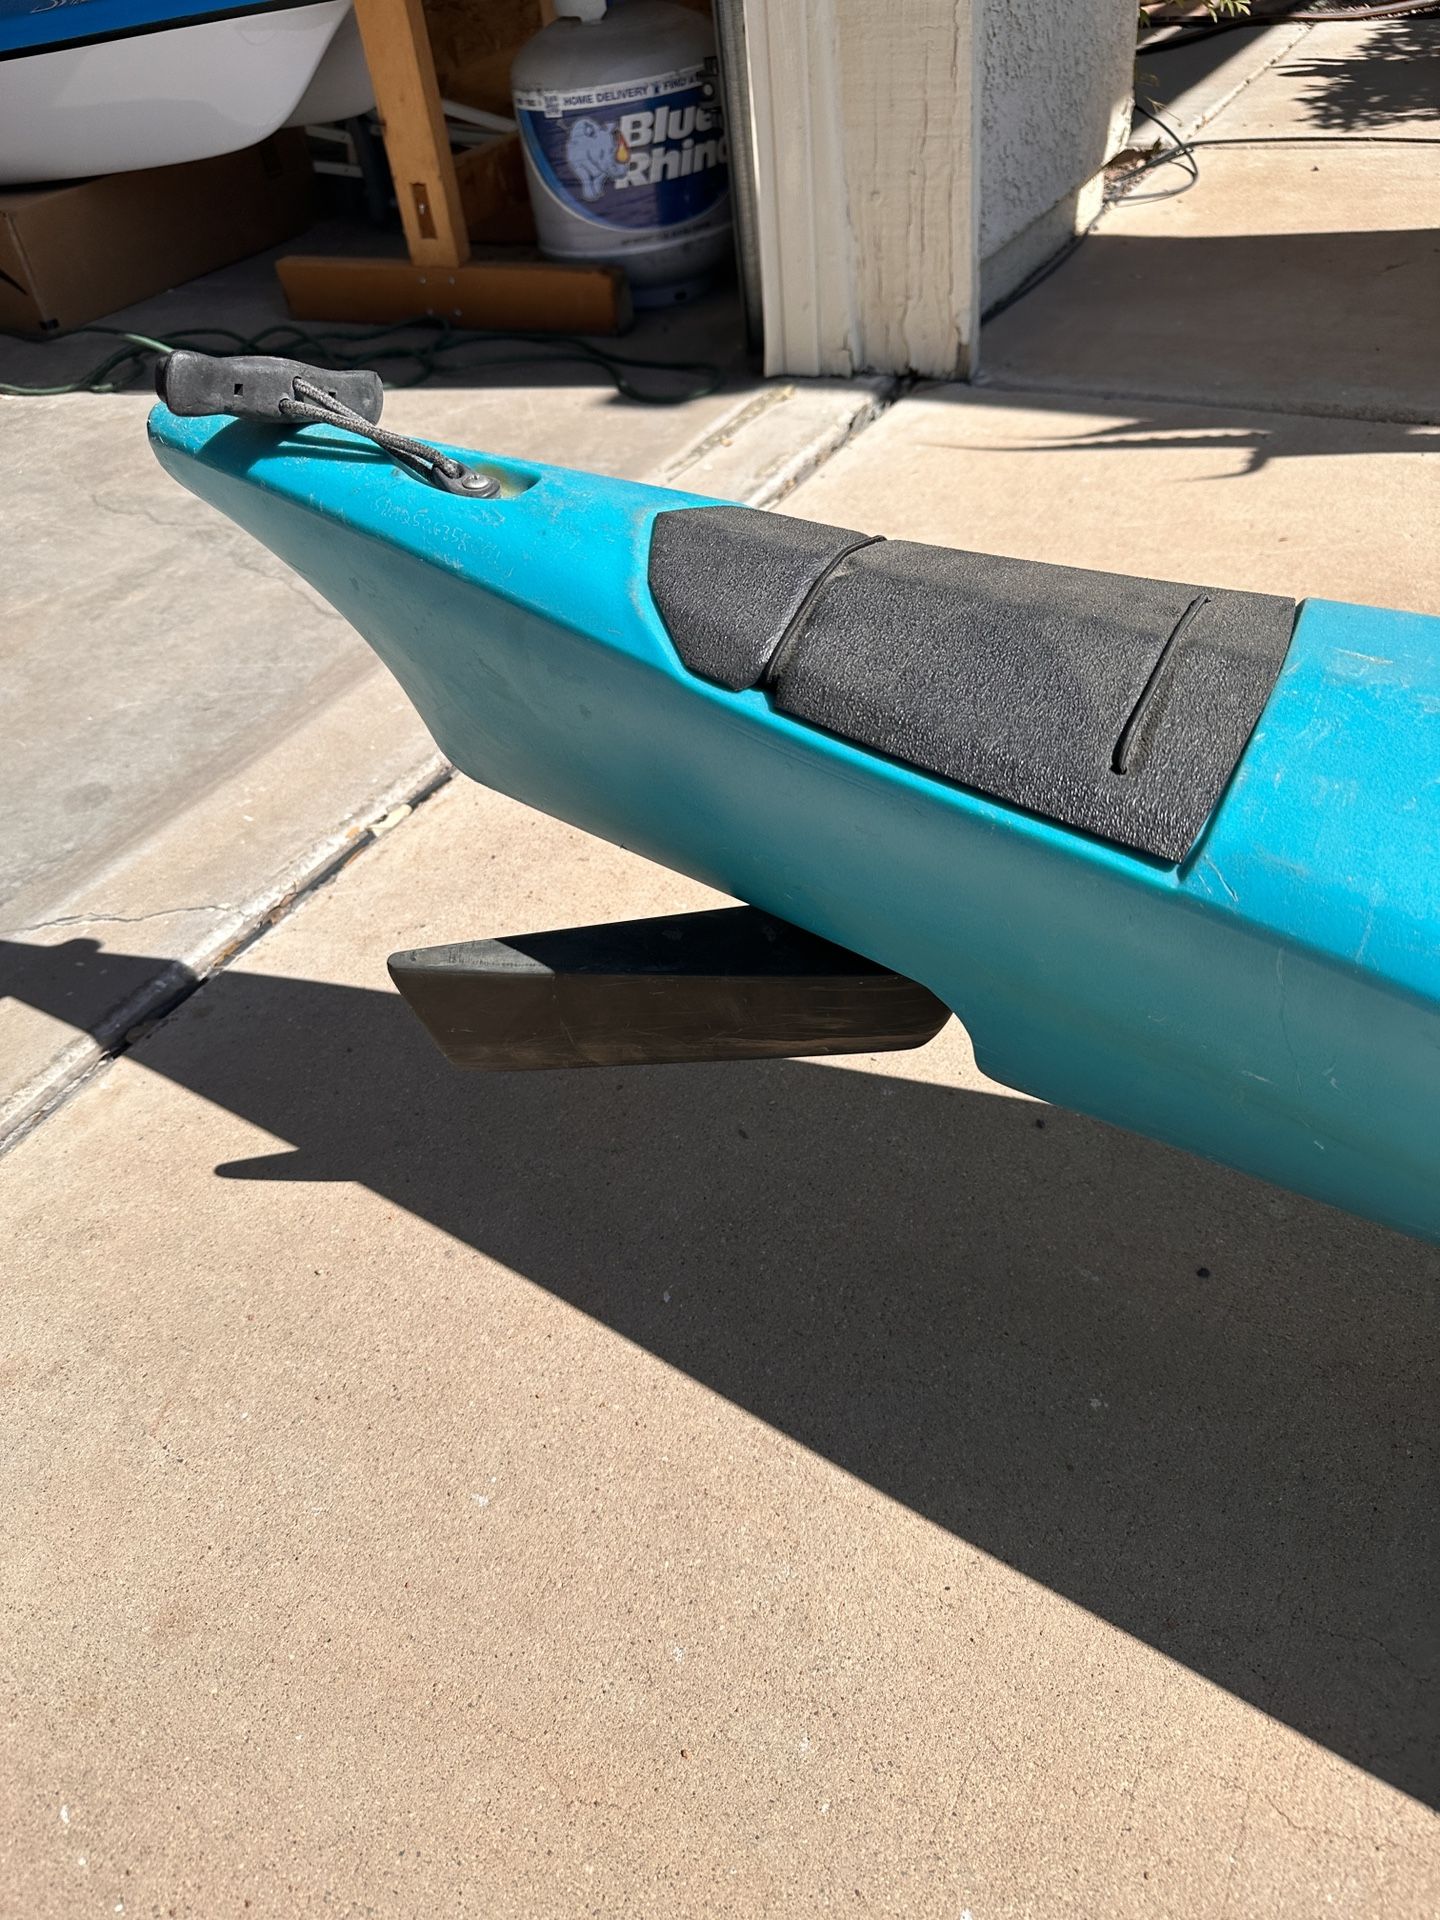
I have a dagger atlantis from 1999 with the integral rudder. I really like this particular rudder system, but my boat I got for $125 is missing the cover in these photos. It looks fairly simple, can anyone recommend how to get the plastic piece fabricated right?
Topkayaker recommended fiberglass, but I’d like to try plastic if theres a way to get it flush. I understand I need some kind of mold. If there is an easier way with plastic I’d apppreciate any advice.
You might try a heavy plastic like a plastic barrel to cut your pattern from and a heat gun or hair drier to shape it. Soften it with heat and bend it over a straight edge for the bends.
Thin cardboard should work or even cardboard from boxes. Some construction paper might work but might be too flexible the cardboard will hold the bends as you trace the edges. A half pattern should work if the whole pattern is difficult.
I made 2 hatch covers for used kayaks I bought by using wood strips and fiberglass cloth with resin coatings. Takes some time but was not difficult.
I used Tite-bond 3 to make the covers themselves and then covered them with 2 layers of fiberglass cloth and resins. Because both were on older plastic kayaks I was unconcerned with the way they looked overall, and I painted them with Rust- Oleum when I was done.
To get water seals I used automotive weather stripping inside the rims. I used wood pieces to get pressure downward on the seals, because both kayaks had the old style retaining straps on the outside of the hull.
I don’t know if this info will help you, but the basic idea may have an application for your dilemma.
I saw where the OP didn’t want to do a fiberglass cover. Looking at the area housing the rudder mechanism I’m not sure it has to be totally waterproof either.
Although I might repair it with a fiberglass waterproof cover and a closed cell foam gasket that doesn’t seem like what the OP is going for. It doesn’t hurt to suggest it though.
A close friend did a plastic cover over a neoprene hatch cover out of a plastic barrel and heat gun for a WS tandem that had lost the plastic cover over the neoprene. The neoprene cover provided the waterproof seal.
I think szinh has a good idea with the wood strips. Just cut wood strips to length and lay them in the recessed area then glue them up with tite bond. The gluing can be done in place because the glue isn’t going to stick to the plastic. I’d want to put fiberglass on top, but really, why? Tite bond is very strong and is water proof, though not intended for immersion. After painting, the glue should be sealed and not get wet.
The reason I fiberglass both sides is the same reason we do it to the strip built kayaks. The Titebond 3 is waterproof, but the wood itself isn’t . It will swell and shrink from wetting and drying and that breaks the joints loose.
But a layer of fiberglass cloth and resin on both sides make it last a VERY long time. Probably 30-40 years.
Start with a cereal box cardboard pattern. Then cut and shape a piece of .060 or 080 aluminum sheet metal. Once done you can fiberglass or just paint. Experiment. Try to match the color of the other covers Maybe wrinkle paint. Use stainless hardware if needed. Aluminum does not crush, rot or deform easily so any fasteners will stay tight and it’s fairly light. I’ve used it on my kayaks with good results.
I had one kayak with an aluminum cover. Not a hatch cover but the building process is similar. There is an added support right in front of the seat made out of quarter by inch and a quarter alum. flat stock.
One valuable tip on using aluminum:
It’s super hard to get a lasting bond with any adhesive in trying to hold onto aluminum. the thermo-expansion rate of Aluminum is extreme, even when we compared it to other metals. Resin and fiberglass have close to zero thermo-expansion. So having one move and the other not move is going to cause problems over time.
But one thing that will work is to make a swarm of hold on a grid pattern through the aluminum sheet (3/4 inch works very well) so the epoxy can grab itself on both sides. So if the bond from epoxy to metal loosens over a 3-4 year period (which it will in 19 cases out of 20) it doesn’t matter, because by having the glue touch glue ,the aluminum becomes the support but doesn’t need to be locked directly to the resin or glass cloth. Think of the holes allowing the glue to become “bolts”
It’s like bolting 2 pieces of steel together, as oppose to braising or soldiering them both together.
Eater way works fine.
But if 2 pieces of metal are bolted together there is no adhesion between them, and none is needed.
Good info. I’ve only primered and painted my parts. Oxidation is the enemy if left bare and not polished regularly. Chipped or scratched paint will show the silver aluminum color. If I’m using multiple alum. pieces lightly polishing and then clear coating them will dull the shine but avoid oxidation and maintenance. Silver becomes an accent color. Anything added to a kayak adds weight so don’t go overboard.