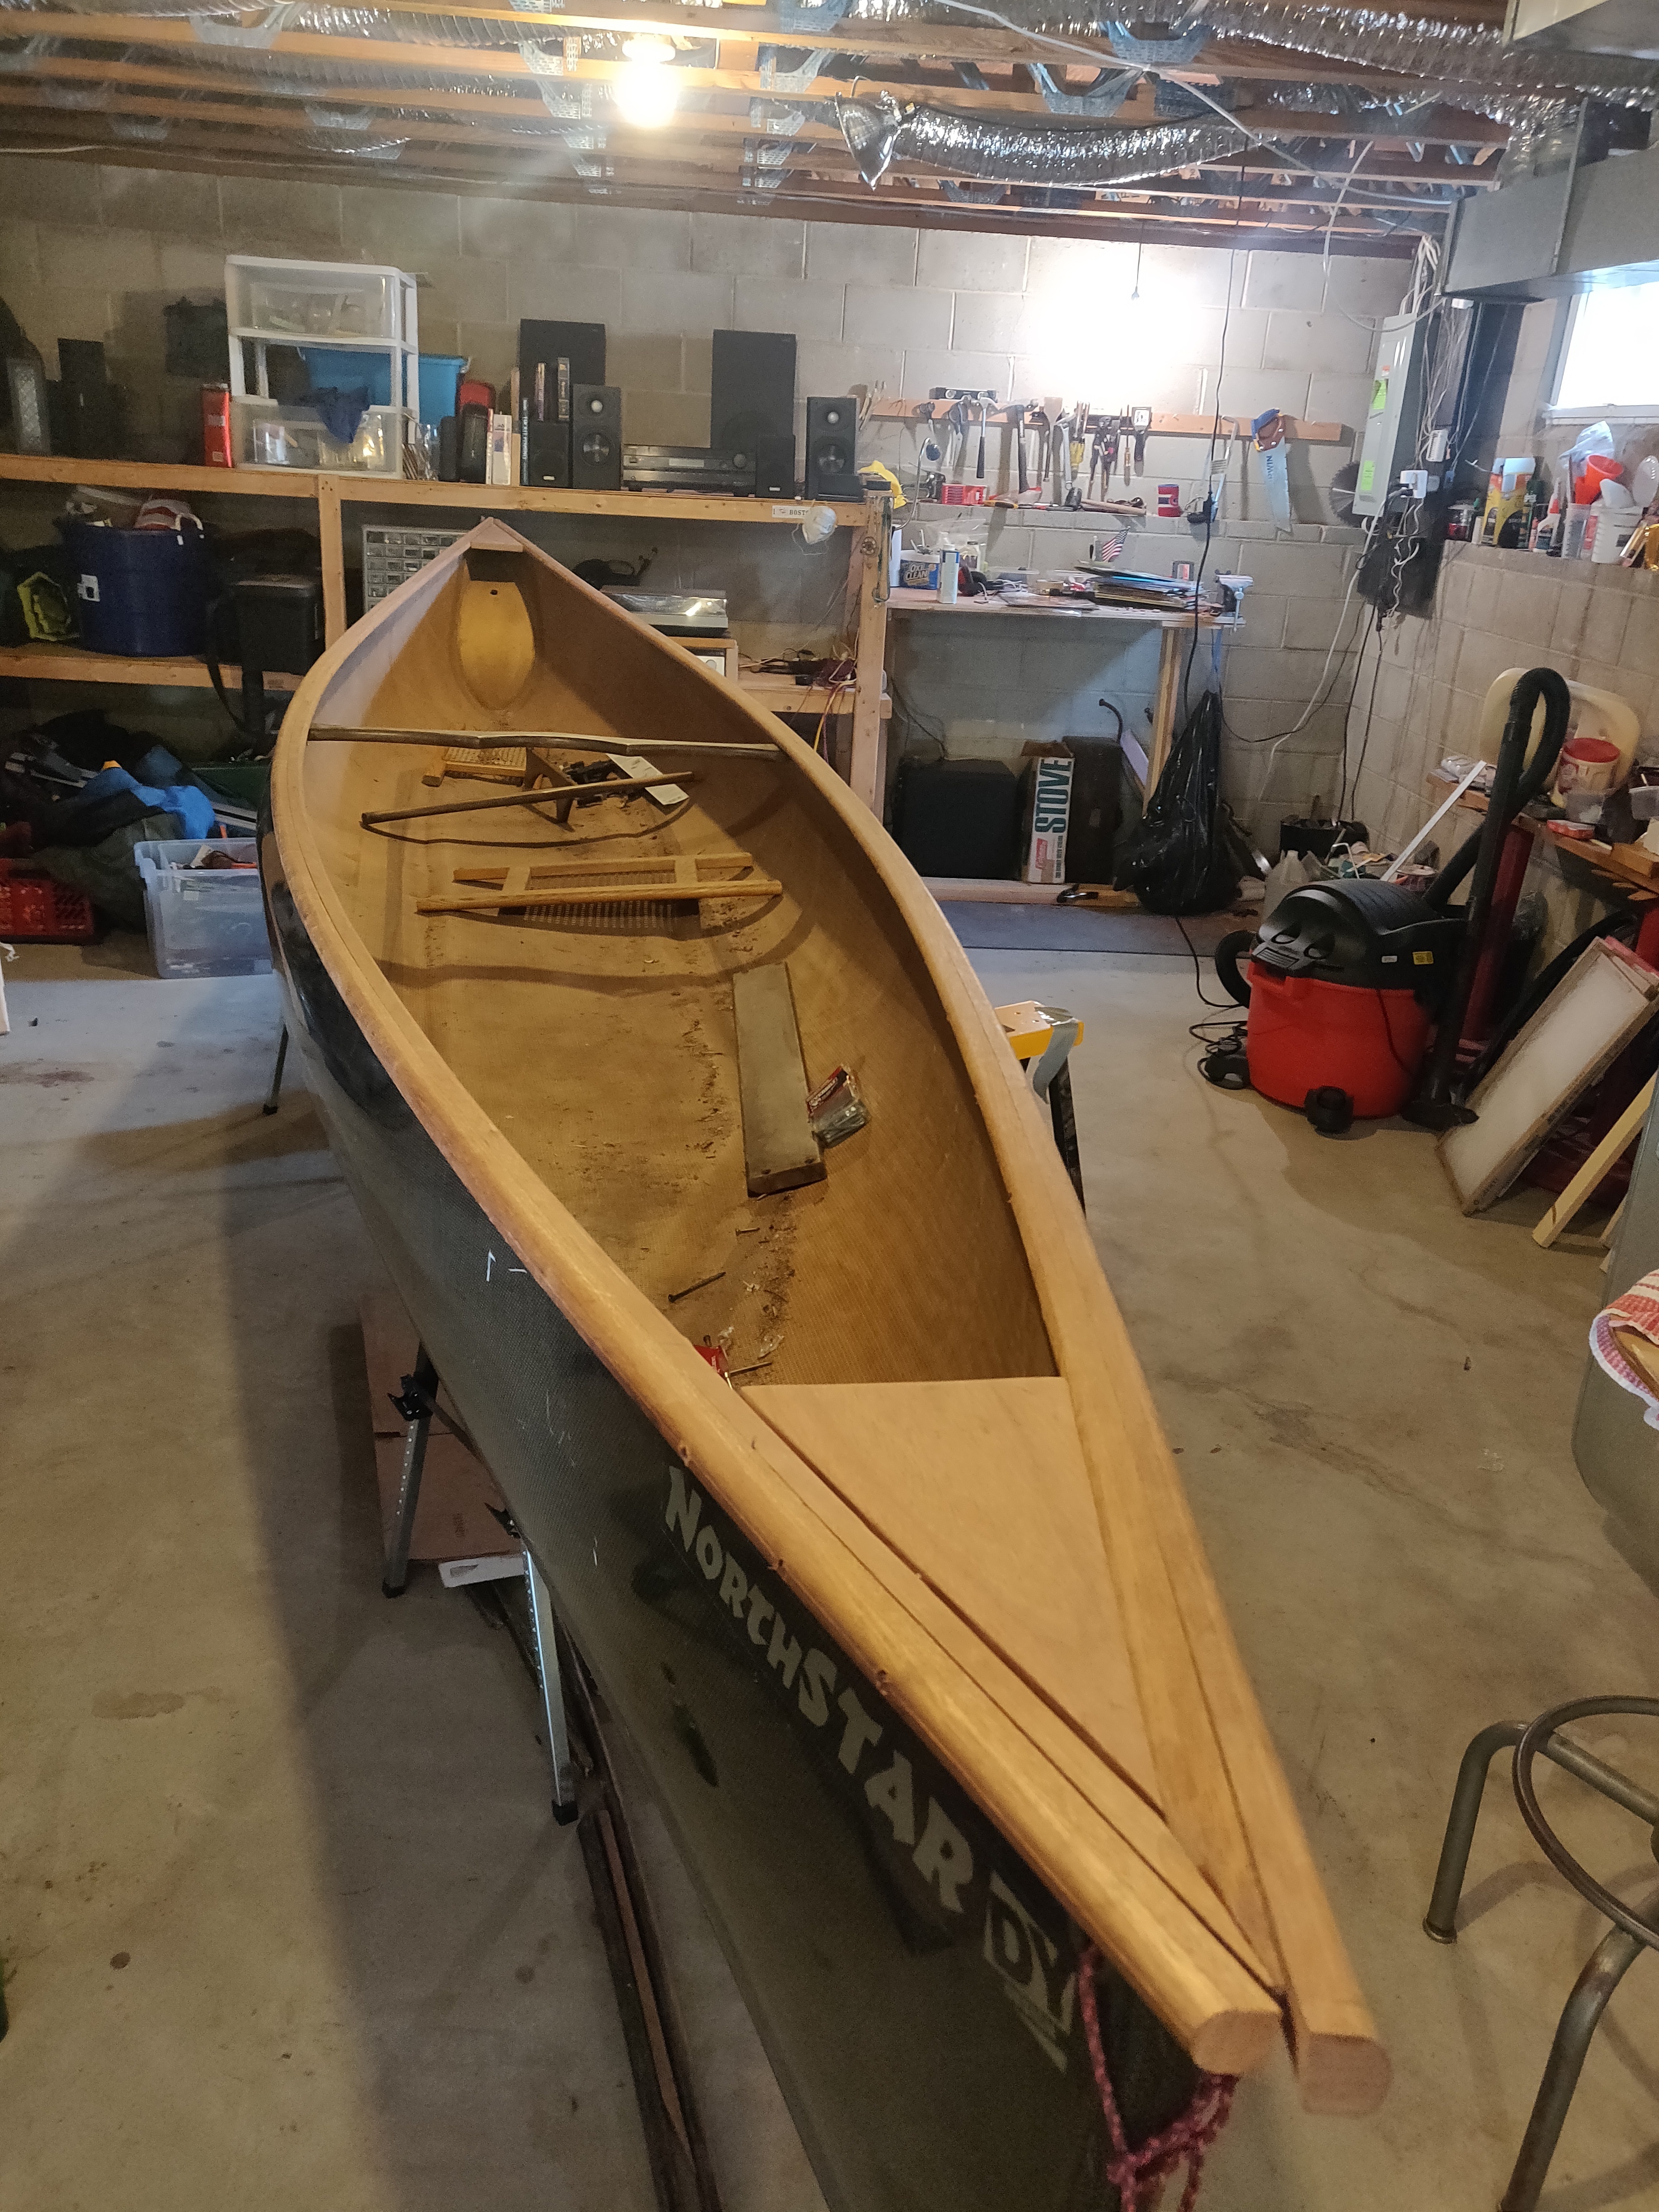
I am in the process of restoring a Northstar I picked up on Craigslist. I’ve done the gunwales and deck plates by hand with mohogany and plan to repair the clear gelcoat with epoxy resin and clear hardener. I’d appreciate some help with two things:
Does anyone know the exact model and layup material (Kevlar or carbon fiber?)
Does anyone have exact measurements (placement along the gunwales) for the seats, thwarts, and yoke (I marked them when I removed the old ones, but sometime tells me that its previous owner moved things around a bit)
The brand is Bell, the model is Northstar and the lay-up is Black/Gold…carbon fiber on the outside and Kevlar on the inside. It’s a great boat…considered one of Bell’s best designs and good enough that they named their new company (Northstar Canoes) after it.
I can’t give you the exact dimensions for seat and thwart placement but one thing you could do is take an image and scale the measurements off of it. The boat is 16’6" long (198 inches) so if you measure the overall length of the image in millimeters you get a scale of inches per millimeter and can figure out the seat and thwart placement. Your woodwork looks great and if I didn’t already have the latest version (Northstar Polaris…not identical but very close) I’d offer to buy it from you. I had one in the past and it served me well.
Bell’s BlackGold layup was their best, at least for flat water boats.
As far as where to place a center yoke, that’s easy. Position it at the longitudinal center of gravity. This is pretty easily determined by simply balancing the finished canoe on a narrow sawhorse at its center. Some people prefer placing a center carry yoke very slightly in front of the longitudinal center of gravity so that the canoe tends to “nose up” a bit when balanced on the shoulders and then hold it down with a short line attached to the bow grab loop.
Personally I would position the seats and thwarts as best suits your needs which depends on who will be paddling the canoe. I have found that the stock placement of many tandem canoe seats to be suboptimal resulting in an excessively bow light trim.
Front seat placement depends on the leg length of the bow paddler. You need to position the bow seat far enough back to allow comfortable leg room for the intended bow paddler behind the bow flotation tank. Position it as far forward as possible with that in mind. Stern seat placement will depend on the bow seat placement and relative weight of the bow and stern paddlers. I usually figure the center of gravity of a seated paddler will be approximately 1 - 1 1/2" forward of the forward edge of the seat frame. So for paddlers of roughly equal weight position the stern seat the appropriate distance from the longitudinal center line of the boat for a neutral trim, or a slightly bow light trim as many seem to prefer.
The Northstar was usually trimmed with two thwarts in addition to the seats and the center yoke, or with a kneeling thwart replacing the stern thwart. If you are going to use two plain thwarts position the front thwart as close to the rear of the bow seat frame as you can while still assuring that the bow paddler’s back will not contact it even when leaning back slightly. The stern thwart needs to be positioned far enough forward that it will not be in the way of the stern paddler’s legs, otherwise place it as far aft as possible, between the center yoke and the stern seat frame…
Thanks all. This is really helpful. Much appreciated. I spent some time today dealing with damaged gelcoat. See below.
I plan on flaking the brittle bits away until the surrounding epoxy won’t come off. Next, feathering with a Dremel, being careful not fuzz up the fiber. Then sanding the edges with 120 grit sandpaper. Then cleaning these areas with acetone and building them back up with layers of epoxy. Finally I plan to sand the whole thing, then roll even coats of epoxy. I welcome suggestions.
One question, how do I maintain the clear finish between coats of epoxy in those damaged areas? It is a question of using finer grit sandpaper? Wet sanding?
I specifically bought crystal clear hardener because I wanted to try to preserve the original look. I know there will be some crazing (or whatever it’s called) underneath the new layers of gelcoat, so that doesn’t really bother me. There appears to be no damage to the cloth anywhere and there are no soft spots.
Btw, thanks again. I love restoring old things (that are worth restoring) and canoes are some of my favorite things. Being Canadian by birth, I have amazing memories of paddling Algonquin Park or places in southern Quebec with people who are dear to me. I’m now in the US and live along the Delaware and can’t with to use it to cross at Washington’s Crossing.
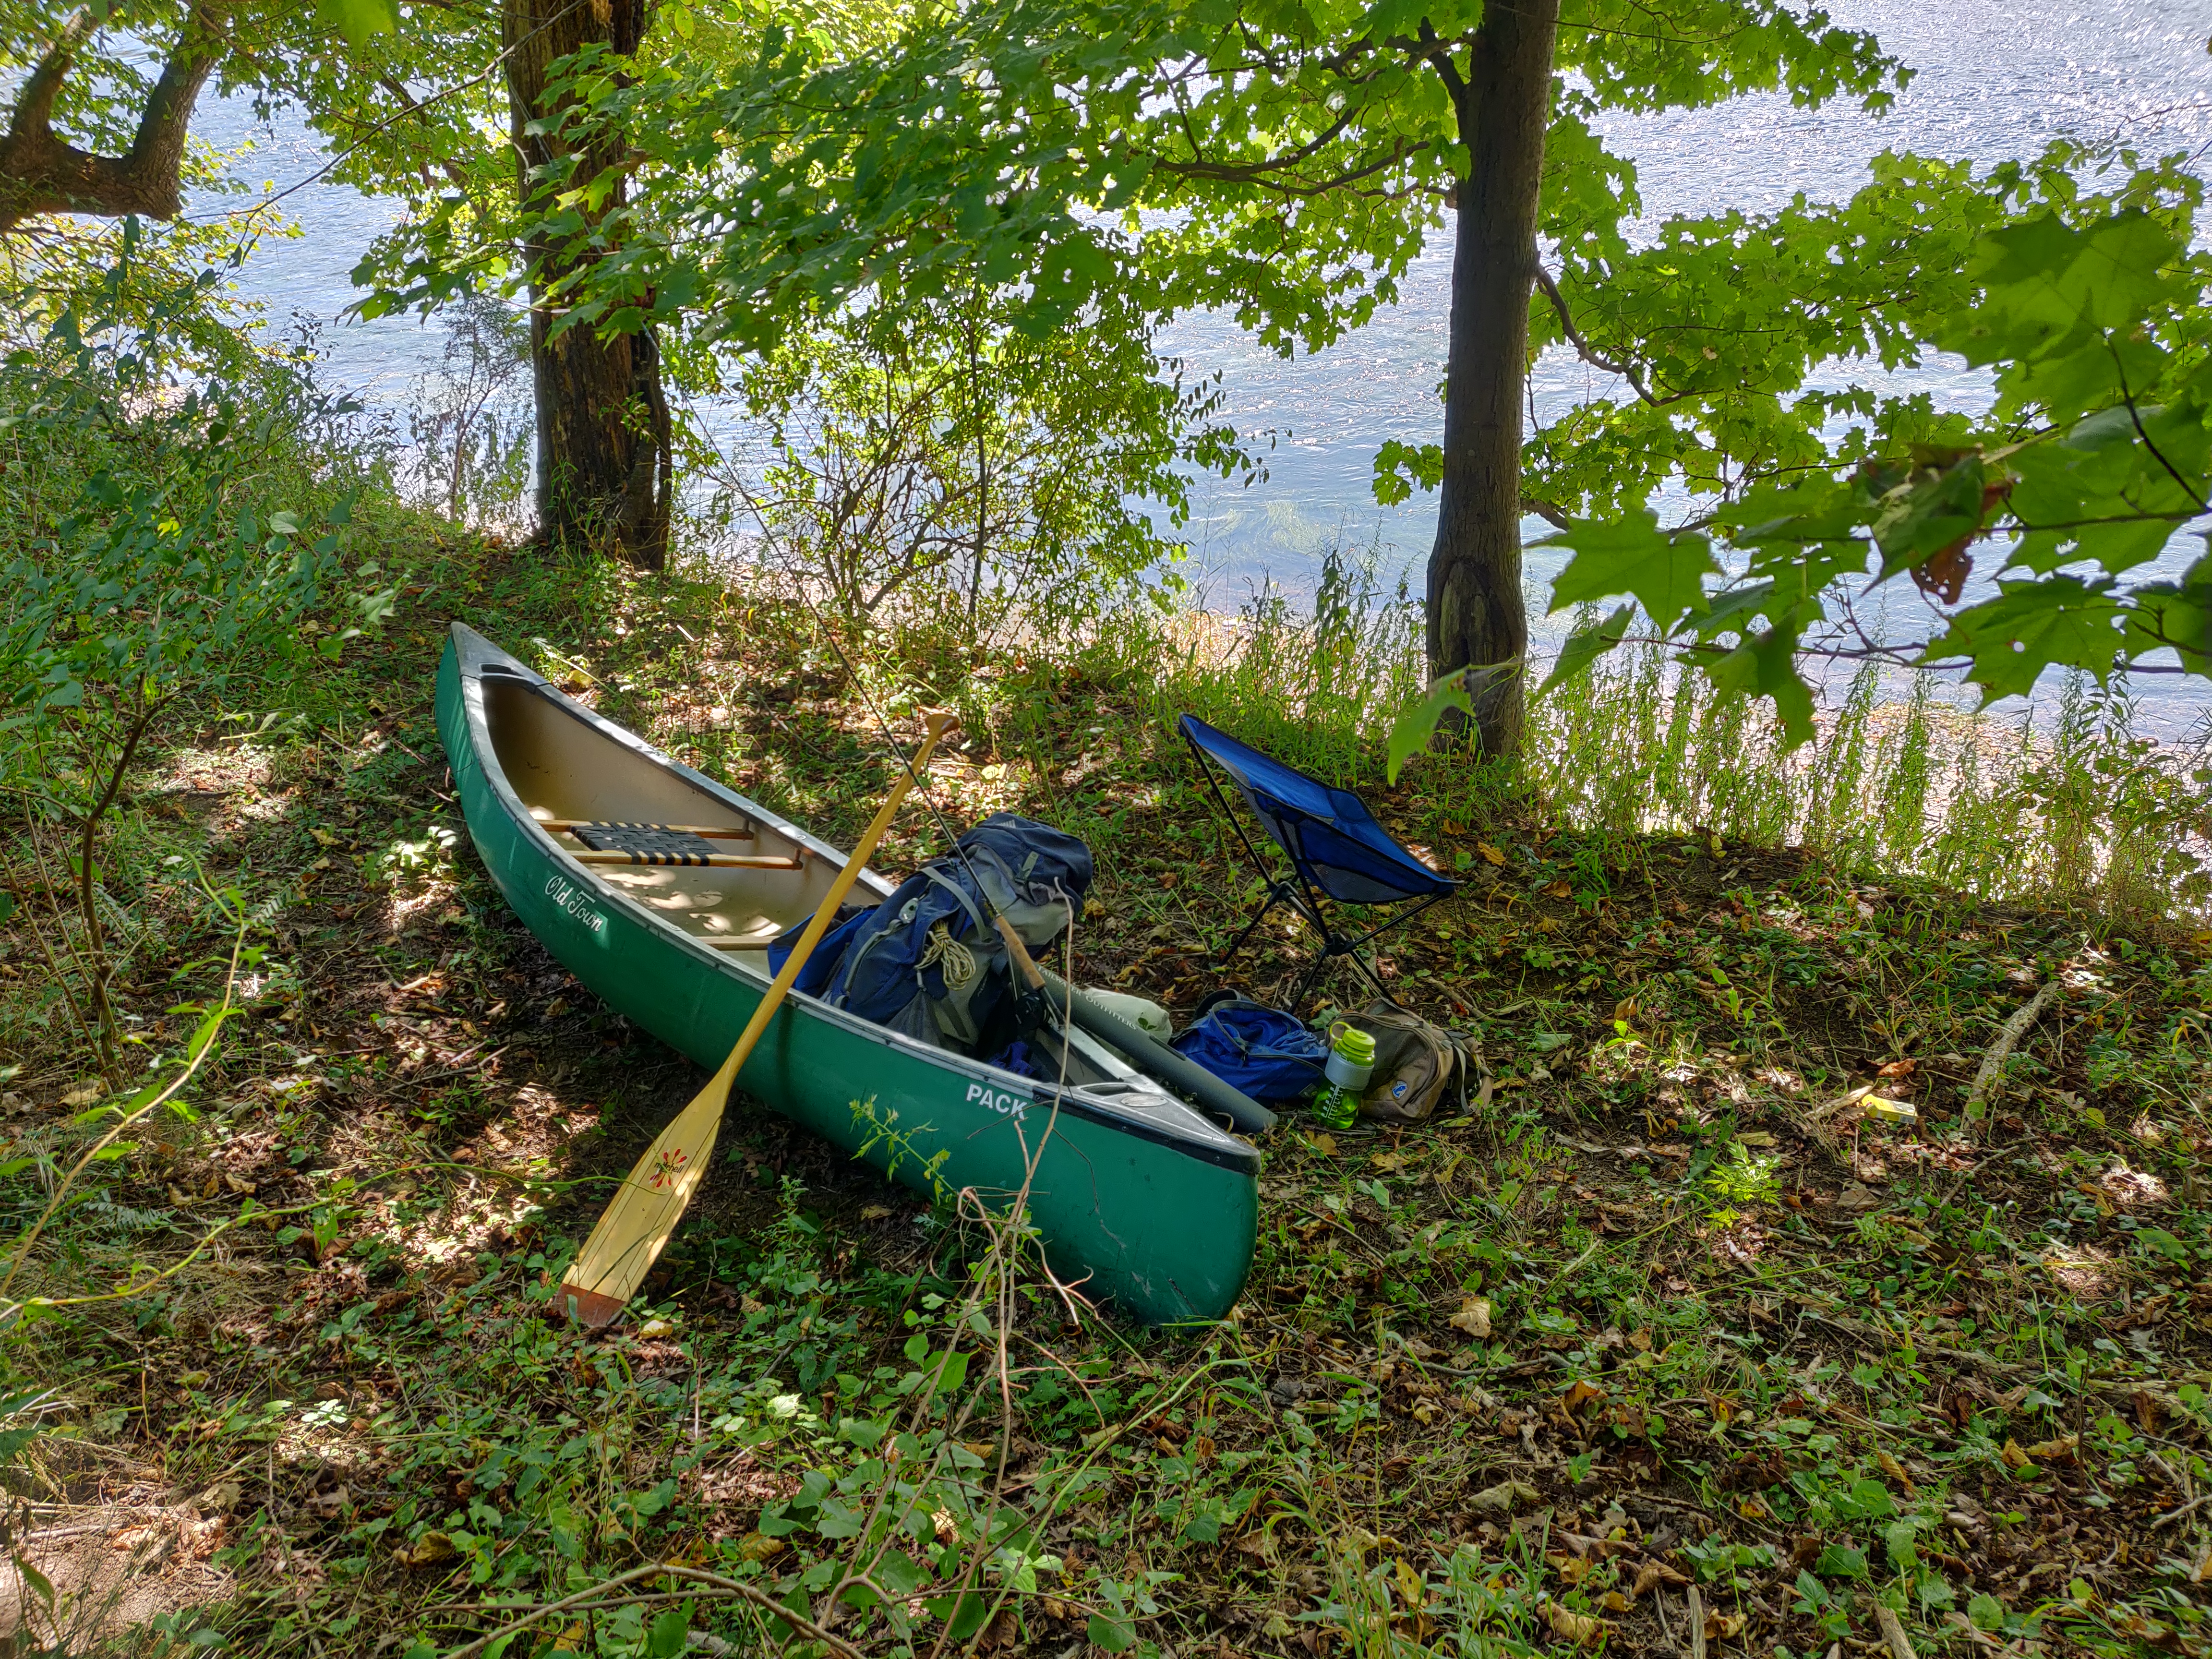
I have restored a Swift Kipawa, an Old Town Pack (thanks again PBlanc!) And a dagger reflection…I gifted the Swift to a friend, but still have the other two.
Between my three canoes, I believe I have a canoe for every flatwater situation. Btw pblanc a photo of the my OT pack on the Delaware Water Gap .
I think pblanc’s comments on seat placement are valid, especially if you are unusually big and you always have the same partner and your partner is small. For general use I’d shoot for the factory seat placement. If you move the front seat forward it will be cramped for normal size people and if you move the rear seat forward the stern paddler won’t be able to brace themselves into the chines of the boat when kneeling unless they are way over six feet tall. I often paddled with a lighter bow paddler and the trim was more ideal with my 70 pound lab added but even when bow light the Northstar performs superbly.
You may get a lot of opinions on refinishing. On another forum someone recently refinished a carbon/Kevlar Bell with varnish as the final coat (and if you go to the Souris a River site I think they have instructions for a varnish refinish). I recently repaired a whammy in my carbon/Kevlar Bell solo with clear gelcoat and Glad Wrap. I wanted to avoid epoxy since it may yellow over time. But I’m no expert in the various epoxy options and on my boat I don’t care about the whole hull having the factory shiny finish, I had sanded 20 years of scratches out of it and stopped at 1500 grit since I think anything finer than 320 isn’t needed for performance and my intent is to keep using it and scuffing it up.
I would wet sand between coats of epoxy. I have used System Three’s Clear Coat (a low viscosity “penetrating” epoxy) to recoat the entire exterior hull on a skin-coat Wenonah Kevlar ultra-light Advantage and after repair of a BlackGold Bell Wildfire. It is easy to work with and gave good results. There has been no evidence of yellowing on the Wildfire after several years now. Yellowing on the aramid Advantage would be hard to detect.
Thanks, pblanc. I pulled the trigger on some. Any advice on how the prep the entire hull for a blanket application? I plan on going easy on the existing coat with an orbital and 120 grit, then wet sand. Did you sand the new coat?
I have generally used flexible foam sanders made by 3M as sanding blocks since they conform to the hull surface better than inflexible sanding blocks or power sanders. I simply wrap wet or dry paper around the foam block.
What grit to start with depends on how uneven your hull surface is and you don’t have to start with the same grit on the entire hull. You might want to start with 120 grit on uneven areas although 220 grit might well suffice. I usually wet sand down to about 600 grit or so before applying epoxy. I will lightly wet sand with 800-1500 grit between epoxy coats just to score the surface a little and I would try to apply successive coats of epoxy within 24 hours of the last coat to get a good chemical bond.
Before applying the first epoxy coat I usually wash the hull well with warm water and Dawn dishwashing detergent to remove any oils, rinse well, and wipe down the entire surface with denatured alcohol. I like using disposable foam brushes to apply the epoxy. I have found that the inexpensive chip brushes shed too many bristles.
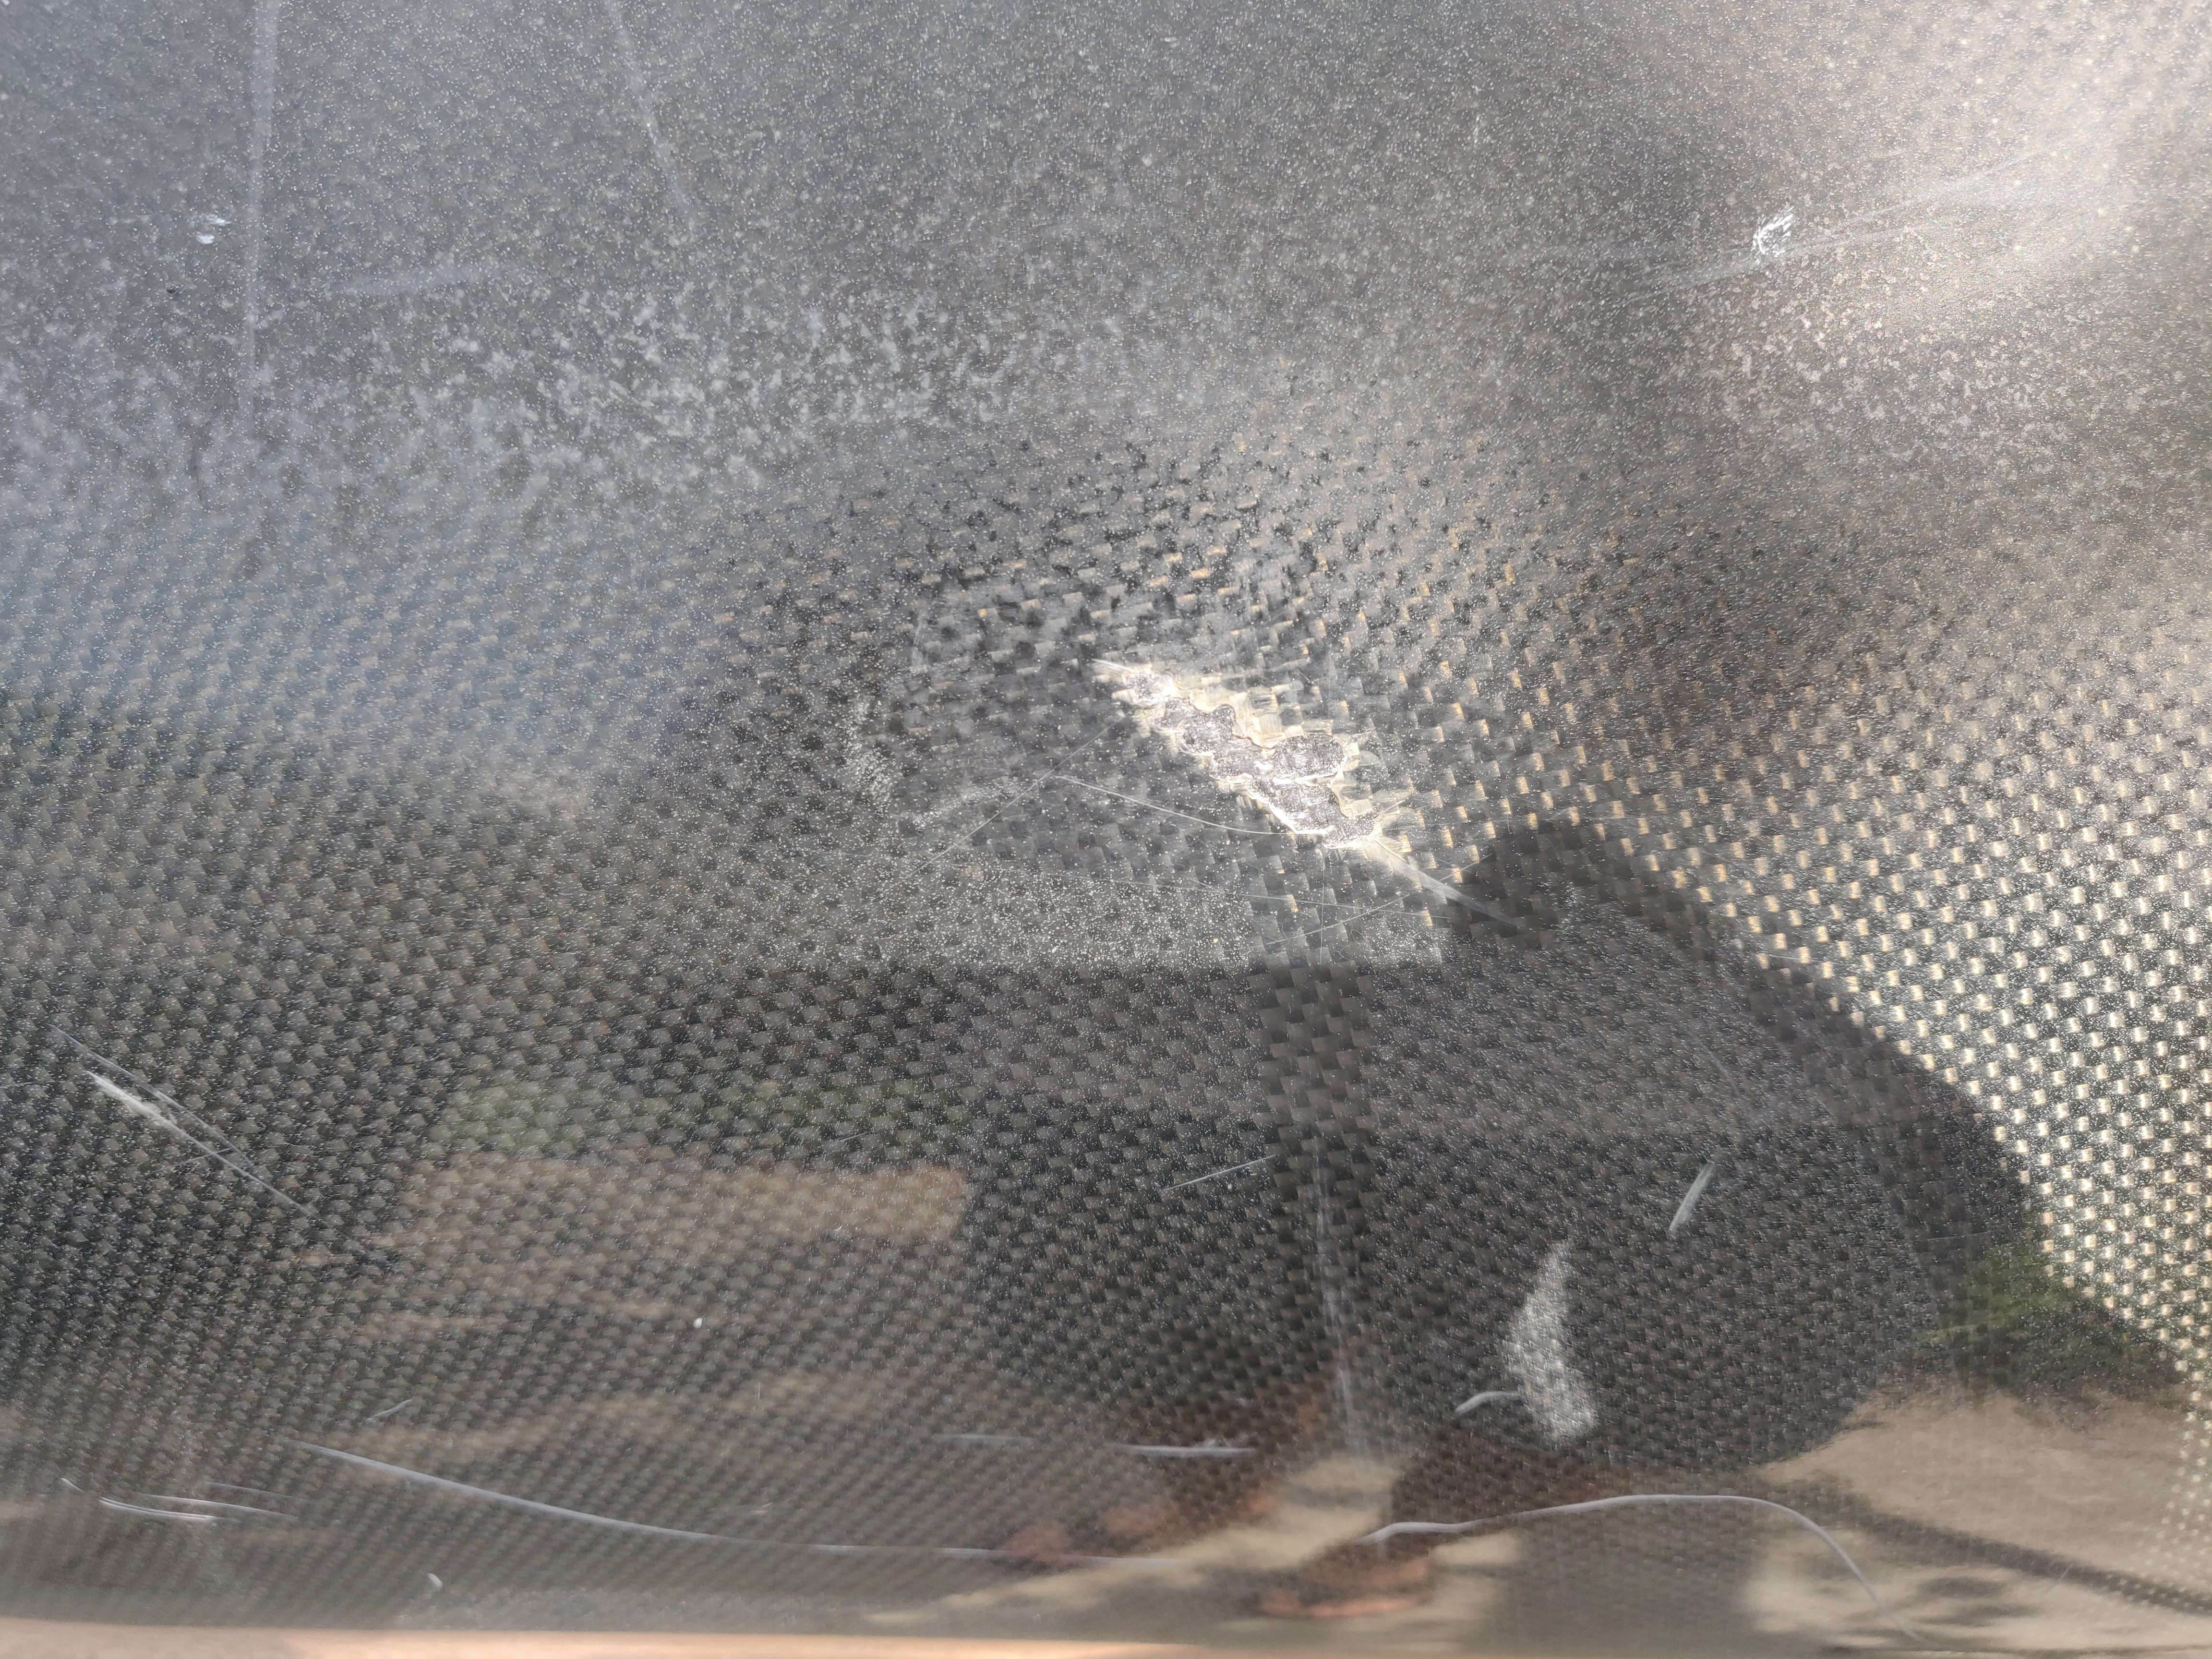
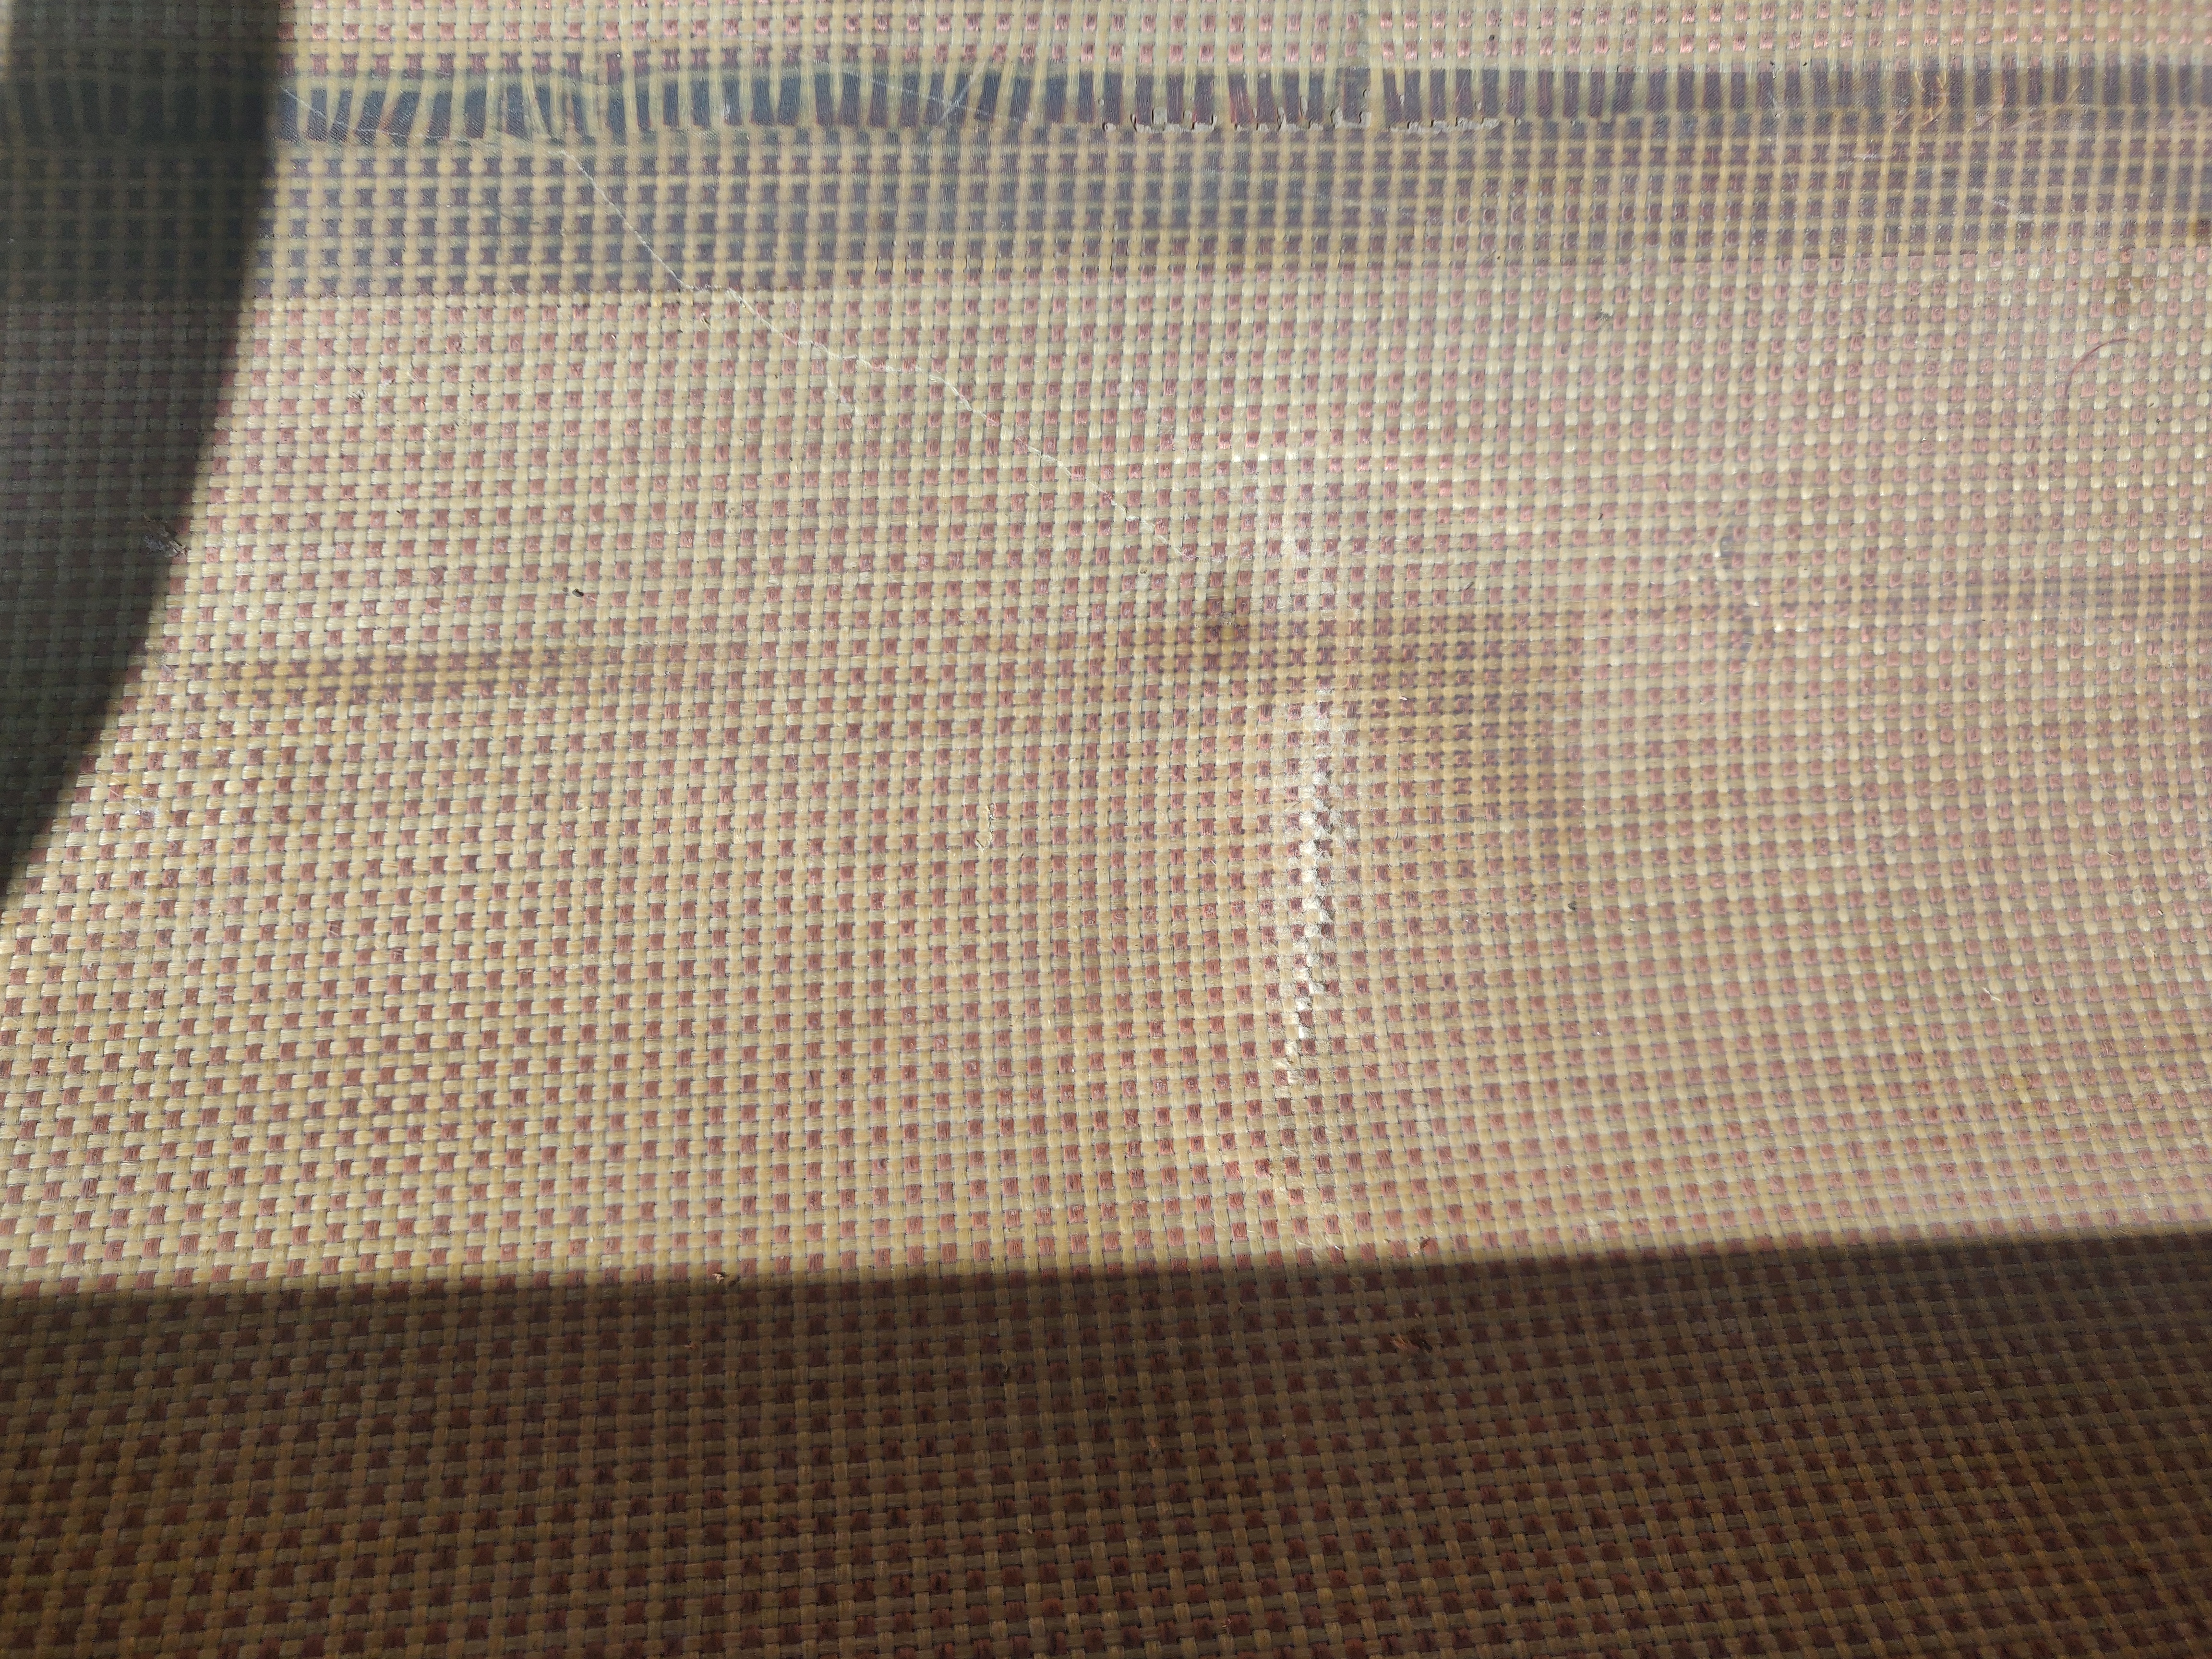
One potential problem. It looks like the layup was stressed and there is a compromised part. I’d rather not do any unnecessary patches, but if necessary…
The “white line” on the aramid interior is characteristic of a lateral impact that caused dissociation of some of the fibers from the resin matrix. Aramid fibers have great tensile strength but do not bond to resins as well as fiberglass or some other materials. So instead of fracturing they usually just pull out of the resin that they were enclosed in.
I assume the lower photo is of the carbon fiber exterior. It appears there are some fractured fibers there. Strength has been compromised somewhat. You might get away with just leaving it but I would be inclined to apply a patch of fiberglass to the interior and exterior. If you use a single layer of plain weave fiberglass cloth no heavier than 6 ounce/square yard and use a clear epoxy completely filling the weave of the cloth and then feathering the edges of the patch on the exterior, the end result will not be very noticeable since the fiberglass will be nearly transparent. You will, however, see a line where the carbon fibers have broken through the clear patch, so disrupt that break in the carbon fiber as little as possible when you patch over it. If you want as inconspicuous as possible you could use 4 ounce/square yard fabric.
On the interior I would use peel-ply (mold release fabric) over the patch to eliminate the need to feather the edges since aramid does not take too well to sanding abrasion. If you do acquire some peel-ply use it on the outside as well as it will reduce the amount of feathering you need to do.
If you remove the clear gel coat from the exact area of where you plan to apply the external patch you will create a slightly shallowed out area that will compensate for the thickness of the patch so that the final result will not stand “proud” of the surrounding hull, or won’t very much.
Yep pblanc’s approach would make it stronger than new. Personally I’d probably decide based mostly on how soft that spot feels when you push on it. It’s probably fine unless it takes another big rock impact in the same spot and if that happens you can always patch it later.
Since it’s a nice day here I want to fishing most of the wood work. My mohogany gunwales and deck plates are much lighter (even when stained) than the walnut kneeling thwart, and replacement ash seats from Ed’s.
Can I stain and use watco oil? I was thinking I would stain with what I have, then finish with oil. Is this possible? Should I wait before applications? Can I just mix the two?
Dave Curtis at Hemlock Canoe sells Watco with stain mixed in although I’m not sure what specific brands he uses. I think you’ll be fine whether you stain first or mix. In my experience the Watco takes a while to dry/cure so I typically let it dry overnight after a couple of light coats and then repeat a couple more times. The final coat may not feel dry to the touch for a week (talking about the green and white label stuff, the Watco teak oil seems to cure faster). Although it takes a while to cure it does seem to give a tough finish that wears well.
Thanks. I ended up just using oil as the color of the “mohagany” (meranti) is a nice dark color.
I’m about to install the seats. Am I right in assuming that the wider of the two seat “bars” goes at the back, to account for greater weight distribution?