If you have never done any work with resin and structural cloth, it really isn’t very difficult, although the first time can be a bit frustrating especially if you don’t have a plan. The videos are of some value, but I would not follow either one of them too closely.
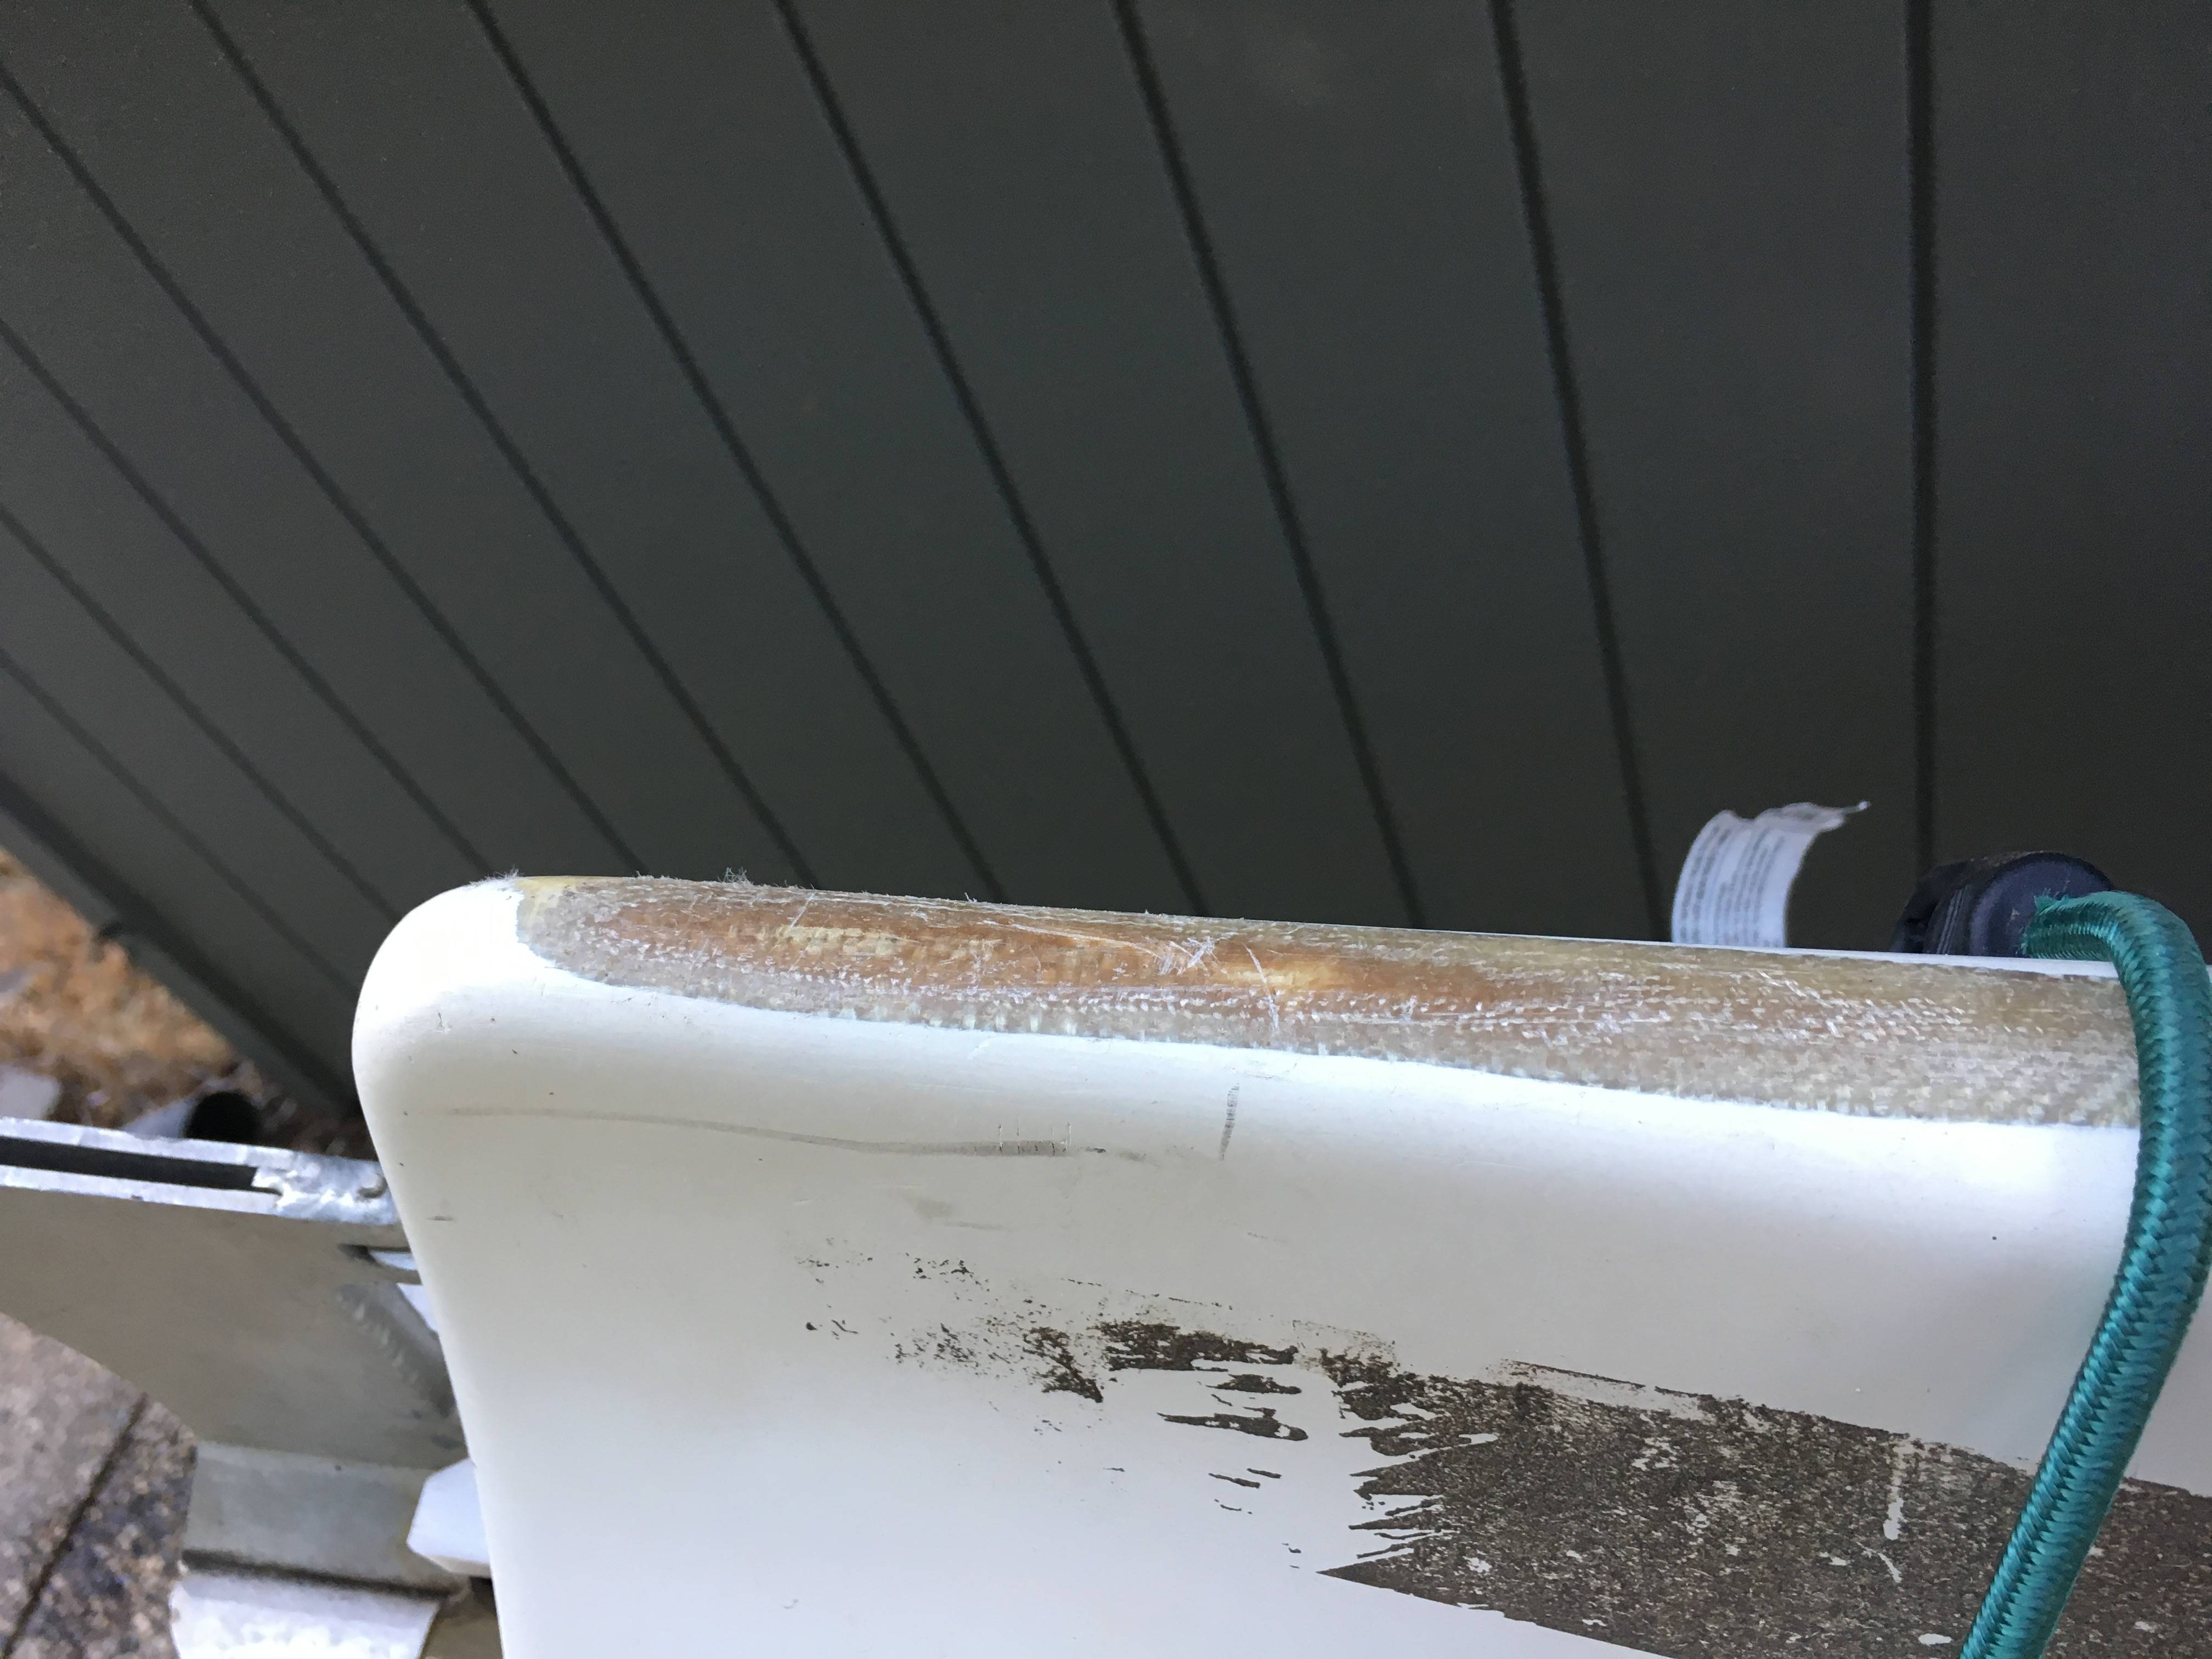
First, understand what you are repairing. Unless your boat has been painted, the white outer layer is almost certainly a polyester gel coat material. That layer provides some abrasion protection and looks nice, but does not provide much strength. Underneath that you have worn completely through the first layer of structural fabric which appears to be a woven fiberglass roving. Underneath that is a yellowish layer which is an aramid (Kevlar) woven roving. This has clearly been abraded, but appears to be more or less intact.
For a quick and dirty repair, you could just cover the area with something like Keel Easy which is a plastic material bonded on with a heat-activated contact cement. That would protect against further abrasion damage so long as it remained intact. It would not restore as much of the lost structural strength of your boat as doing a repair with resin and cloth would.
The videos give you the basic idea of what is involved with doing a repair using fabric and resin. If you feel that this is something you can handle, the first thing I would do is buy this kit which will provide enough epoxy and fiberglass cloth to do a repair, as well as a few of the other incidental items you would need:
http://www.westsystem.com/fiberglass-boat-repair-kit/
This kit is available from a variety of vendors. I found in on Amazon for around $30. In addition, you would need some masking tape, wet or dry sandpaper in a variety of grits, possibly some additional disposable gloves, paper towels, solvents (denatured alcohol and/or acetone), a pair of cheap scissors, and some spray paint that closely approximates the color of your hull. A bottle of white vinegar from the grocery store is also useful for cleaning epoxy from your plastic spatula and mixing cups so they can be reused.
The videos show a polyester resin material being used. Most paddle boat builders and back yard repair types use either epoxy or vinyl-ester resin these days. Epoxy has traditionally been the strongest, although I am told that there are some military-grade vinyl-ester resins as strong as epoxy these days. But vinyl-ester resin has a limited shelf life and often requires you to buy it in greater quantities than you need. The methyl-ethyl-ketone peroxidase catalyst is also somewhat toxic and very, very bad if you get any in your eyes. Bottom line: use epoxy.
Epoxy is a two part adhesive resin but the components must be mixed in fixed proportions. In the kit I cited above, the packets of resin and hardener contain the components in the proper ratio so you don’t need to weigh or measure them. The kit contains plain weave fiberglass cloth. As was shown in the first video, plain weave cloth is subject to fraying. This is not a big problem in your case since the repair can be done using rectangular strips of fabric that can be cut directly along the line of the warp of the fabric. One or two strands of the warp will fray along the edge so you simply cut the cloth slightly larger than you want the patch to be. Fiberglass tape with a finished selvage edge is easier to work with but the edge tends to soak up a lot of resin and leaves a raised edge that is harder to feather smooth, if that matters to you.
When bonding cloth to a damaged composite hull, I have always followed the advice of Charlie Walbridge, author of “The Boatbuilder’s Manual”, to sand until you see fibers. This means sanding off the white gel coat over the area you want to bond your fabric to. This will allow a mechanical bond directly to the structural fibers of your hull, rather than to an intervening layer of polyester gel coat. In the second video, the gel coat was not sanded off. I would plan your repair to completely cover the worn through fiberglass layer and overlap the adjacent intact fiberglass by at least 1" on all sides. Although the gel coat layer is not very thick, sanding in off will result in a slightly dished out area that your repair will sit in and that will allow you to feather the edge of your patch cleanly into the adjacent hull without having it stand proud of the adjacent hull.
You also want to sand the fiberglass layer a little just to rough it up a bit and remove any embedded grit. Go easy on sanding the yellow aramid layer. Aramid does not sand well and tends to “fuzz up” when abraded. If you have any aramid fibers sticking up that might interfere with laying fiberglass over the aramid, shave them off with a sharp knife. After sanding, clean the area of the repair well using a brush, detergent soap and water, then rinse well. When dry, clean the area using denatured alcohol, acetone, or both.
I would plan on a two layer repair. I would make the first patch just big enough and the right shape to completely cover the aramid cloth that has become exposed, replacing the fiberglass layer that has worn away. You can use stiff packing paper to cut a template for this layer, then lay in on your fabric and cut a patch just slightly oversized. Mix up a small batch of epoxy and apply it over the exposed aramid with one of the acid brushes or the black spatula, then lay your patch on it carefully and fully wet it out as shown in the first video.
Your second patch can be a perfect rectangle big enough to cover and overlap the area of damage. Mask of the boundaries of your repair area. You can apply the second patch while the epoxy of the first is still “green” which will allow a maximal chemical (in addition to mechanical) bond. Again, apply a thin layer of epoxy, lay on your fabric, and fully wet it out. When working with your cloth, be gentle to minimize fraying and start wetting it out in the center and work toward the edges. Try to keep the lines of the weft and warp of the fabric aligned as you go.
I would let the epoxy of your second patch cure to a green state, then trim off any fiberglass strands that overhang the masking tape at the edges of your repair. Remove the tape and let the epoxy fully cure. You can now use wetted sandpaper to cleanly feather the edges of your second patch. Again, wash the area well and wipe with solvent, then remask the boundaries of your repair right along the edge of your intact gel coat.
You will need at least one more application of epoxy to fully fill the weave of your cloth. You can use the 410 Microlight fairing filler with this coat. The fairing filler will thicken the epoxy a bit and it makes the cured epoxy very easy to sand smooth. Apply the thickened epoxy over your repair and allow it to cure fully. Then wet sand the repair with fine-grit paper until smooth and nicely faired into the gel coat at the edges of your repair.
When you are happy with the final result, you will need to wash and mask off the repair one last time, then spray paint it to cover the repair for UV protection. The paint will tend to scratch off but it will be very easy to clean up the area, mask it off, and respray it any time you want. Don’t try using polyester gel coat over the repair as shown in the second video. Polyester resins and gels may not cure reliably over cured epoxy.
Here is a photo album detailing a repair I did on a fiberglass/aramid composite canoe hull using West System epoxy, plain weave fiberglass cloth, and fairing filler. The repair also involved interior aramid patches that don’t apply in your case, but the exterior patch work was somewhat similar to what would be involved in your case. If you click on the individual photos, the captions describe the steps:
http://www.flickr.com/photos/42020723@N02/albums/72157629802721866