Hi all, this is my first post to the forum. My wife and I live in Utah but are both originally from the upper midwest so we have fond memories of taking big heavy aluminum canoes out on Minnesota lakes and rivers. We just bought a '94 Mad River Explorer Special Edition in Kevlar and are getting ready to repair it. The gelcoat is damaged in a few spots and there are a few areas of spider cracks. I have ordered some gelcoat from Wenonah and am assembling some other items we need to use it. I have MEKP and am going to get some appropriate sandpapers as well.
The interior of the canoe looks to be in good shape, and I don’t see any damage to the kevlar layer, not that I really know what I’m looking for. The seller of the boat seemed quite knowledgeable (perhaps he’s on this forum) and my understanding is that gelcoat is mostly cosmetic anyway, it’s not too important as compared to the rest of the structure of the boat.
My main question is: when removing cracked gelcoat from an impact site on the hull, how far do you go? Do you keep flaking it back with say a razor knife until it’s not easily popped off?
ETA this is the most helpful video I’ve found showing how to do the repair. I’m basing my plans on the advice I got from the seller and this video, and of course additional info I get here.
Flake off anything that is clearly loose then bevel the edges of the remaining gel coat around the edges of the areas from which it is missing. Know what type of gel coat you are using. Some types will not cure in the presence of air and must be covered with plastic or waxed paper. Other types contain waxes that rise to the surface and form an air barrier without the need to cover the repair.
Do not expect to get a color match because you won’t. If you are picky about the color of the repair, you will probably get a closer match painting over the repair with automotive touch up paint or such after it is cured. Cracked gel coat that is not loose may actually hold up for many years. Some folks claim that water will get under the gel coat at the cracks and cause more gle coat to delaminate, or even cause damage to the Kevlar structural material underneath, but I have canoes with chipped and spider -cracked gel coat, including Kevlar Mad Rivers, and have not seen any evidence of this happening over decades.
Look inside the canoe opposite the areas of more severe gel coat damage. Kevlar and other aramid fibers have great tensile strength and the fibers seldom break. What they do first is disassociate from the resin matrix because the bond of aramid to resin is less strong than one would like. If this has happened, you will see little white lines running through the interior Kevlar layers where aramid fibers have come loose from the resin matrix. If you see this, it does not necessarily mean that you need to do a structural repair. It depends on the extent of fiber delamination. If the hull feels firm it is probably fine. If it feels at all spongy, you can apply interior patches of Kevlar to the damaged areas.
The video is pretty good. Personally, I would not try to gutter out and fill in all of the tiny hair-line spider cracks in the gel coat. I would only address those in which it looked like there was gel coat that might be loosely adherent and prone to flaking off. The gel coat does not provide any significant structural strength. It is there for abrasion protection, protection of the underlying layers against UV degradation, and cosmetic appearance. If you try to fill in all of the tiny cracks, I can pretty much guarantee that the cosmetic end result will be worse than if you had left them alone.
There are a lot of videos of how to do it on YouTube. You will need a temperature of 65 degrees Fahrenheit, or more to do the repairs. Do not try to do too much at any one time. The gel coat needs to cure overnight.
You will need wet/dry sand paper and many grades (coarseness) from about 400 to 1500-2000. You don’t need a special high dollar polishing compound–Turtle scratch compound works great. One thing that I think is essential is a really good random orbit polishing tool. The Harbor Freight Dual Action 6" Polisher (Chicago Electric) is a good one. You can usually find them on sale for under $60. This tool is not for the sanding–that is pretty much all by hand. The polisher is for finishing the job.
When you apply the gel coat, don’t spend a lot of effort trying to brush it smooth with the surrounding area. The gel coat will shrink as it cures, so overfill a little bit. Be sure to wipe the area to be repaired with acetone just before applying the gel coat.
After the gel coat cures, I usually start with dry 600 grit and very carefully and lightly begin to work the repair area. The undamaged areas adjacent to the repairs should be protected with masking tape, or I use black plastic (electrical) tape. After the initial dry 600 sanding (very lightly), I go wet with the fine stuff. You will be amazed at how quickly the sanding process goes. It’s probably best to use some type of backing like a little wood block to back the sand paper at least while you’re working it down. I admit that I finish up the sanding with just my fingers for the backing, but that depends on the size and extent of the repair. Don’t be discouraged if you make a booboo and sand a little too much. It’s easy to start over and add another coat of gel.
Lastly comes the polishing and here is where you will really appreciate the electric polisher. Be sure to get a stick on (Velcro) polishing pad for the polisher and use the polishing compound sparingly.
I know this all sounds a little tedious, but it really goes quickly and it isn’t hard at all. You will most likely be using polyester gel coat. Keep it shook up to assure better shelf life. I know some people say that you can freeze it to make it last longer. I was told by a professional boat builder No! Just keep it shook up from time to time. Either way, this stuff does have a limited shelf life, so don’t buy much more than you need.
@pblanc Thanks so much, great info! I agree that it’ll probably look worse if I try to get all the cracks, I’ll just focus on the stuff that’s not adherent. It’s reassuring to hear that you have first hand experience with kevlar Mad Rivers with gelcoat cracks that have still held up well. I did order burgundy gelcoat because I wasn’t finding anything remotely similar to that locally, but I understand that new gelcoat is not going to match the finish on a 25 year old boat. As to the underlying structure I believe it’s sound, haven’t noticed any weak spots but I will take a closer look with your information in mind this time.
@magooch Thank you very much for the advice! In SLC this time of year we are lucky if our lows get below 65 so temp shouldn’t be an issue, if anything it may be too warm at times. If I work in the mornings the temp should be ideal, it’s usually in the low 70’s rising to high 90’s later in the afternoon. I am more concerned about the abrasion and UV protection of the layers underneath the gelcoat so I may not go all in on the aesthetics of the hull yet, just hoping to make it more suitable to get on the water and then later may try to make it look prettier!
Thanks both for the informative posts, I appreciate it.
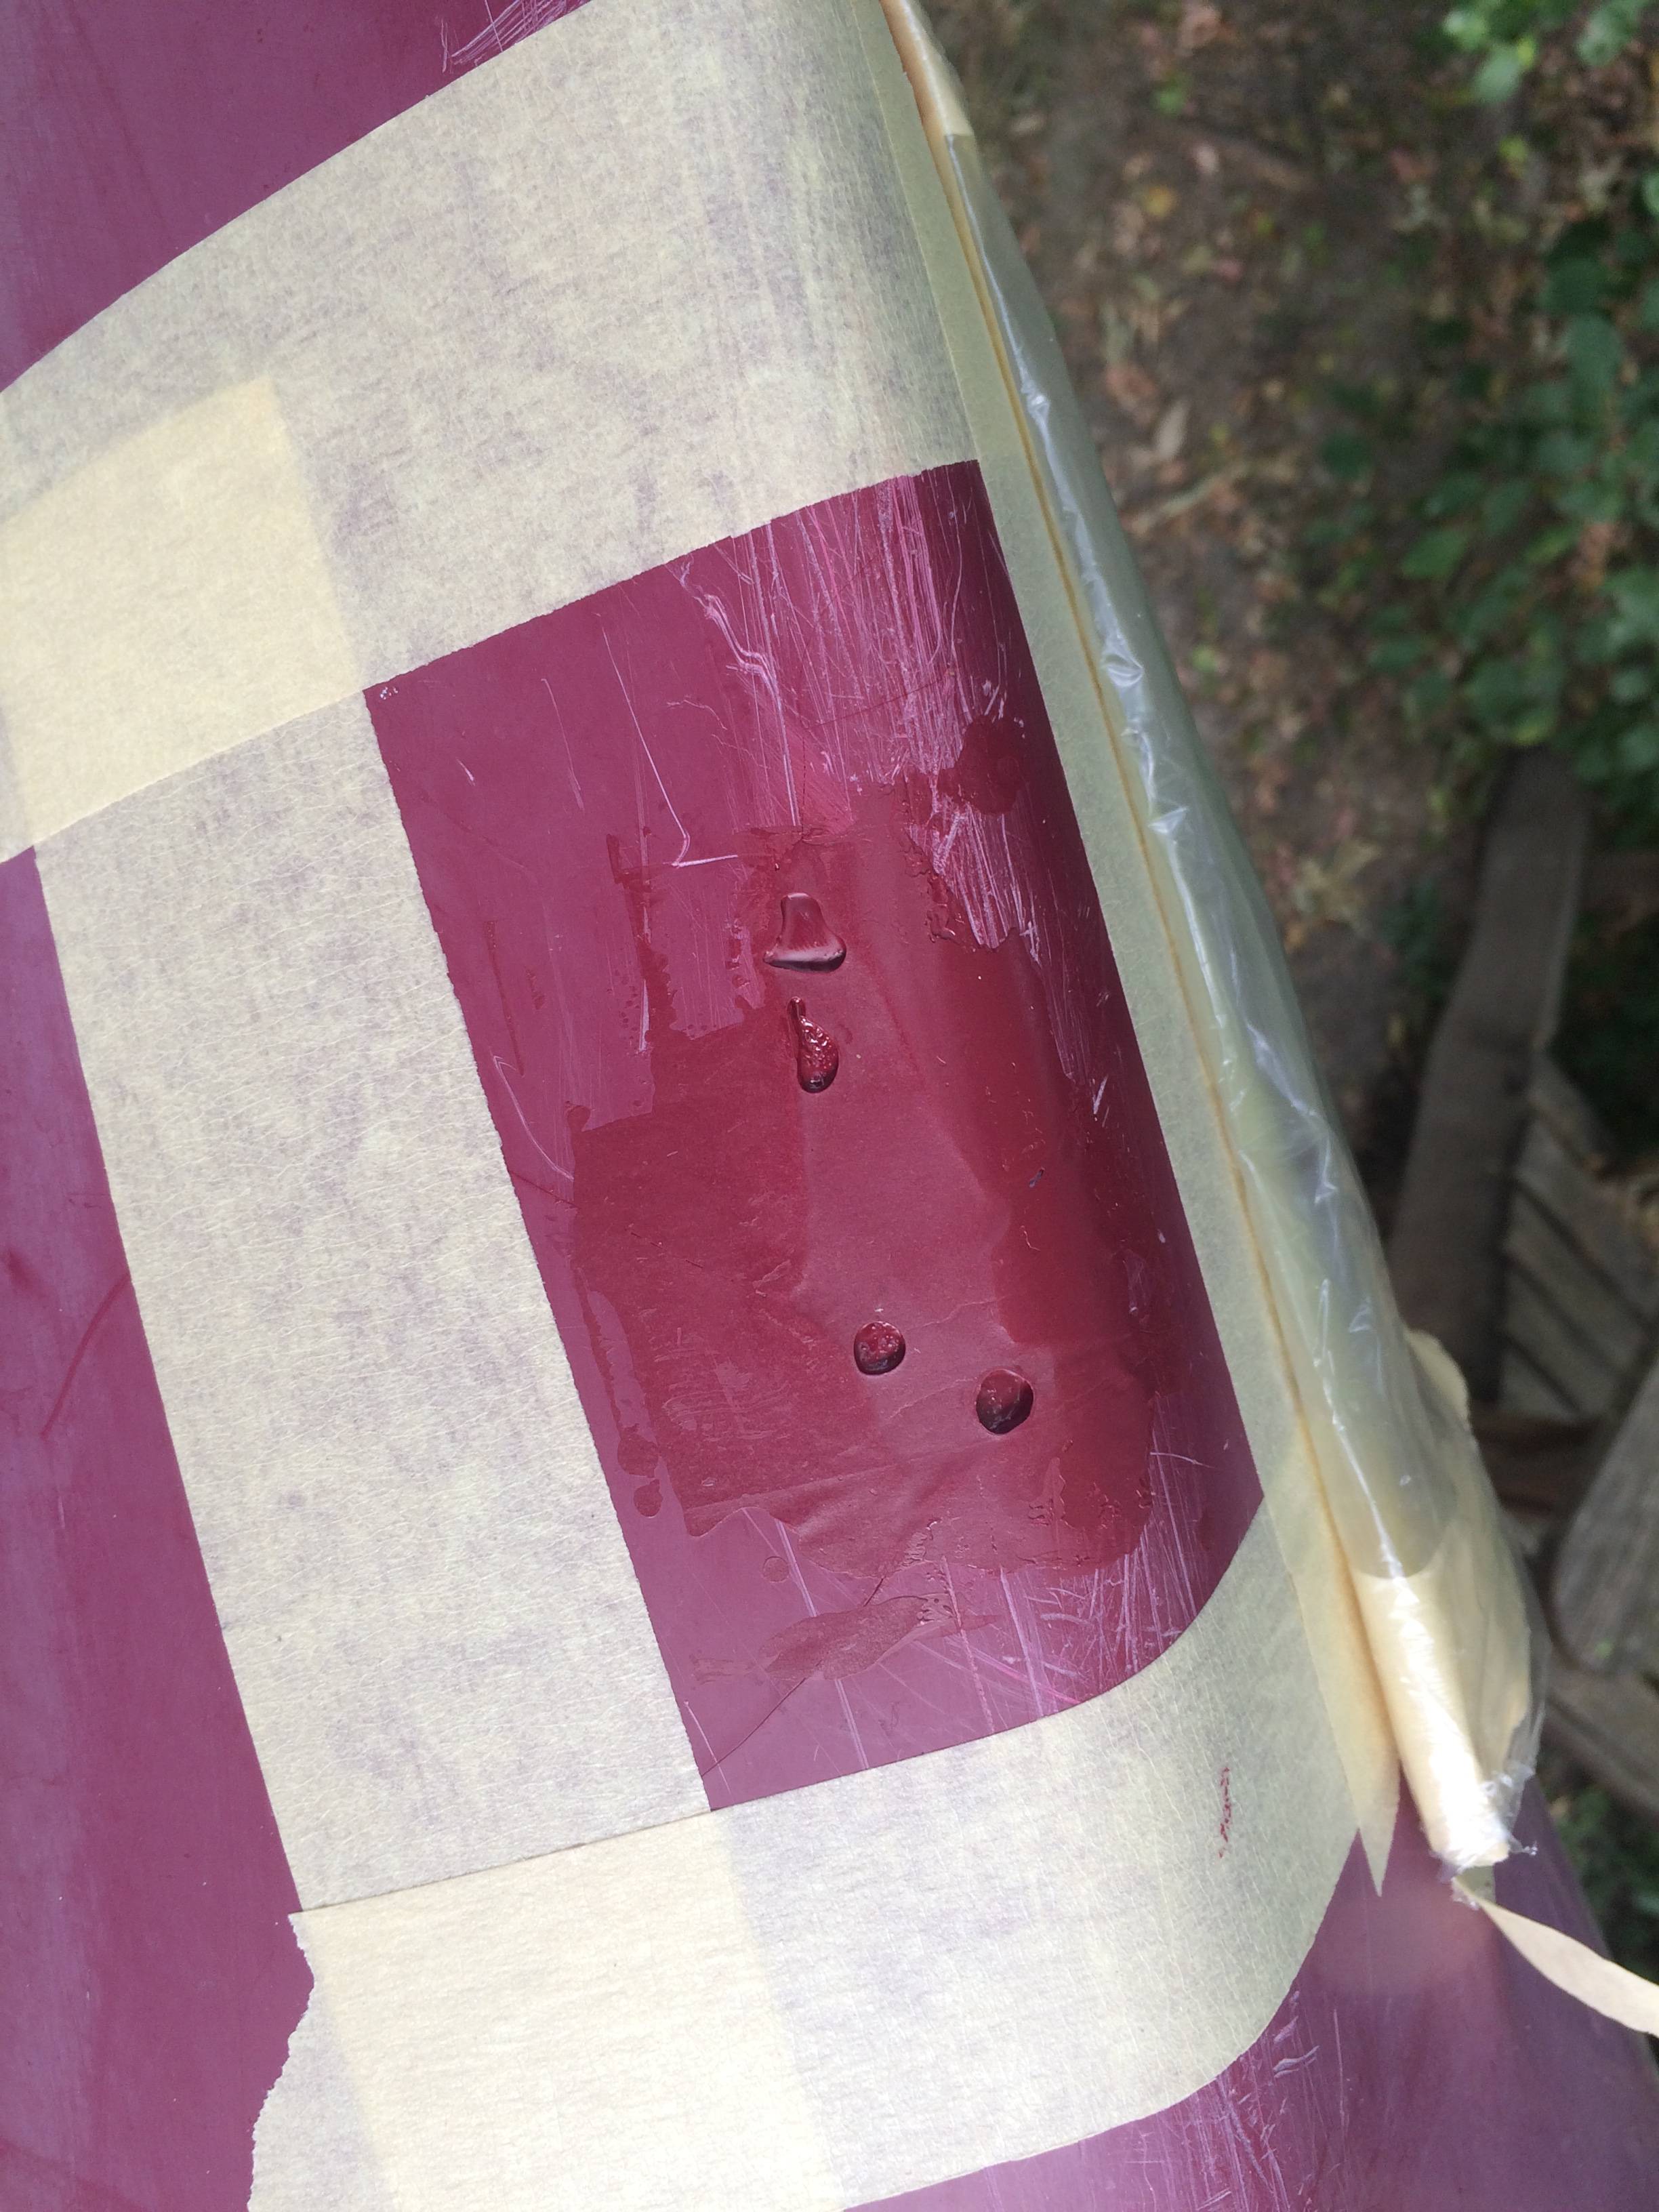
My gelcoat from Wenonah finally arrived this week. Last night I prepped a couple of the damaged areas, flaking off the unbonded gelcoat. Here’s the larger one, the smaller one was about dime sized right on the keel.
I sanded it with 100 grit and then wiped with acetone. This morning the temp was 68F so it was about perfect for gelcoat before I headed to work.
Looking forward to pulling off the wax paper tonight to see how it went! This part of the boat had pretty thick gelcoat, so I’m not sure if I got enough in there or if it’ll be a low spot that needs more work.
Thanks. There were a few 1/4” round voids that were low. I’m assuming in these areas maybe I didn’t chip back the old gelcoat quite far enough and the new material wicked in under it. So I’ll do as you suggested and sand and recoat.
Last night I scraped out the soft gelcoat from those voids in the photo. Then I sanded, removed dust, acetone wiped, mixed up some new gelcoat and filled the area in. It seemed solid this morning so hopefully all is well. Still not sure what caused the voids but it does seem like if you follow the arc of the cracks in the gelcoat, that’s where the voids formed. So the liquid gelcoat could have wicked into those cracks I suppose.
If the gelcoat was soft, it most likely means there was air present in those areas. Typical “laminating” gelcoat will not cure in the presence of air; it’s meant to be used in a mold where it will be covered by subsequent layers of cloth and resin. When applied to the exterior of a boat, you either have to cover it with something airtight and remove any air bubbles, or buy a wax additive to mix into the gelcoat that forms a protective skin over it as it cures. “Finish gelcoat” contains the wax additive and it will cure in the presence of air, but that’s not what you’re going to get from a boat manufacturer.
@bnystrom said:
If the gelcoat was soft, it most likely means there was air present in those areas. Typical “laminating” gelcoat will not cure in the presence air; it’s meant to be used in a mold where it will be covered by subsequent layers of cloth and resin. When applied to the exterior of a boat, you either have to cover it with something airtight and remove any air bubbles, or buy a wax additive to mix into the gelcoat that forms a protective skin over it as it cures. “Finish gelcoat” contains the wax additive and it will cure in the presence of air, but that’s not what you’re going to get from a boat manufacturer.
The gelcoat was purchased from Wenonah and is the stuff included in their gelcoat repair kit. I already had some sandpapers, rubber gloves, and mixing cups so I opted to just order the gelcoat. The label did say “Polycor” so that must be what they are repackaging, but I think that’s more of a brand name than a specific product. https://www.wenonah.com/Items.aspx?id=36
The areas that I repaired all cured just fine and are solid, with the exception of those 1/4" voids. The thin amount of gelcoat at the bottom of the voids was still quite soft and I could scrape it out. My theory (again just speculating) is that after I covered the repair with wax paper, a little bit of the still mobile gelcoat flowed into some cracks or voids, leaving a pocket of air. I feel like given more time the thin bit at the bottom of the voids would have cured, but it’s hard to say since I scraped it out and did another round of gelcoat last night. Everything seemed nice and solid this morning.
Applying more gelcoat over the soft stuff would actually allow it to cure, so there wasn’t any real need to remove it, but you’ve basically done everything right. Typically, I’ll wet sand a repair to 1500 grit, then polish it, but it’s up to you to determine how much you care about the appearance. Your repair looks fully functional as-is.
I did 400, 600 and 1000 grit wet sanding, and I think I’m done with the first three patches that needed done. This color would look amazing all polished up, but there are many spider cracks and I don’t think it’s worth the effort to make it look pretty. This boat has seen a fair amount of use and I’m fine with it appearing a little “rustic” as long as it’s functional.
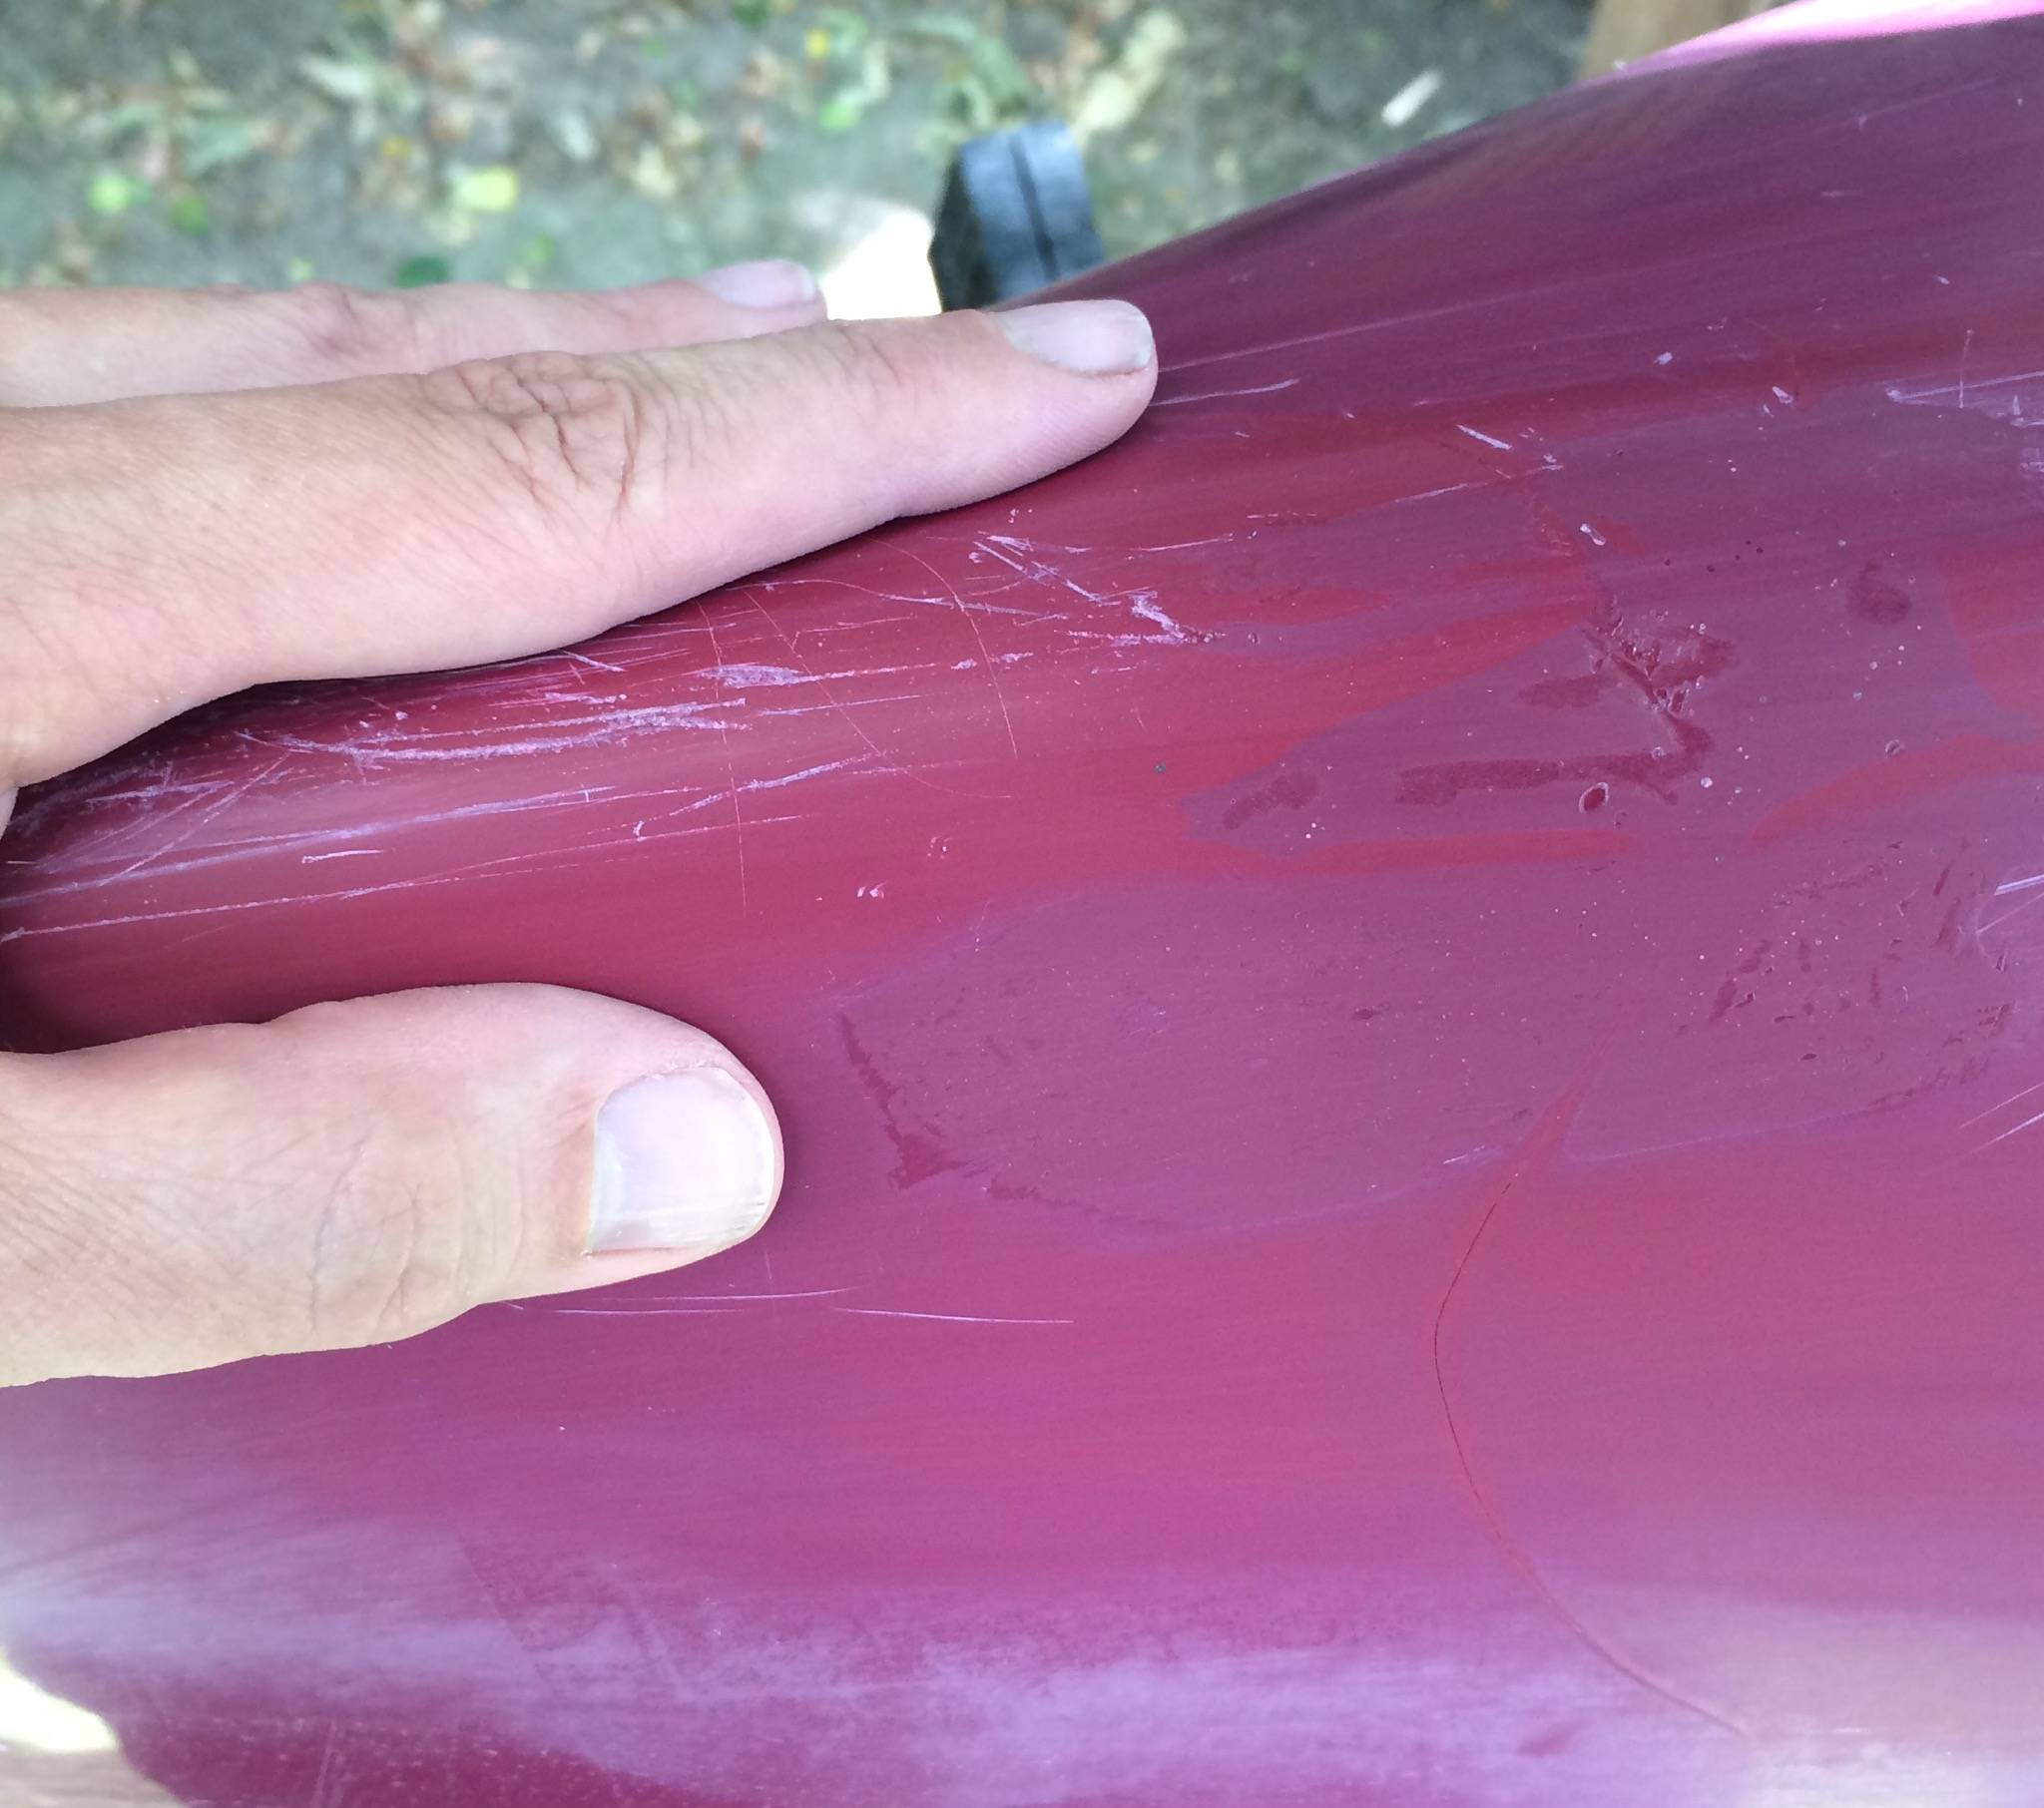
Now I’m working on the section shown in the very first photo I posted. I was more intimidated by this so I saved it for last, as it is on less of a flat surface and there were many cracks. When I was flaking away any loose gelcoat I found that most all of it was pretty well adhered so I stopped. I made a little mistake when sanding and fuzzed the kevlar just a bit (oops) but it wasn’t too extensive. I’m just going to proceed in a similar fashion to how I did the other patches earlier, I’ll be pleased if it comes out as well as those.
On Kevlar boats, don’t use sandpaper, use a carbide paint scraper that you can find at any home center or hardware store. That will allow you to feather the edges of the gelcoat - which is important - without causing the Kevlar to get fuzzy. As long as you apply pressure to the gelcoat after you apply it, you shouldn’t have any issues.
I would plan on doing this repair in two stages. First, apply enough gelcoat to thoroughly saturate the fuzzy laminate with a little extra. Cover it, then apply tape over the cover to compress the gelcoat and fuzz. That will make sure that everything is nicely compacted. You want the end result to be below the level of the surrounding hull surface.
Second, clean up the area as necessary and apply the (hopefully) final layer of gelcoat, as you’ve done previously. This way, you won’t have any fibers poking through the gelcoat.