Keeping the thread current on all things Bud related today I built the roof rack extensions so we can haul both the canoe and her rec kayak. I actually made it wide enough to hold two canoes as a neighbor has been looking for someone to float our river here with and he has a pickup that could haul two canoes and if I can carry two also we can simplify needing a livery service. I’m also going to have to figure out a way to widen her rack I’m putting on her brand new KIA Sportage we bought last week. She already said no 2x4 racks on the new car and I ordered cross bars for her rail system that will work for one or the other but not both. So I will be doing something similar to this that goes on and off easily.
The extensions I show below I loaded the rec kayak on just to test the idea and as you can see I have extra room for the Guide 147. I drilled the same holes in the extensions to pin the ladders to help get the canoe on and off. it is about a 5 minute switch over adding these on or off.
I think it is going to work ok.
How are these attached to your standard bars?
I made the bars across shown black painted from PT 2x4 and attached to some smaller blocks that are screwed into the roof at the factory mounting points. The extension bars are also PT 2x4 and I drilled holes thru them with counter bores so the washer and hex head don’t stick up. I reach under the black cross bars and put 4 nuts and washers on and tighten from the top. Its pretty quick to do and really solid once on. If there is a weak link it would likely be the KIA mounts in the roof. They are 6mm and seemed strong when I put them on. 
I bought a tie down kit off Amazon and it came with two straps for under the hood where you take two bolts out and sandwich the straps in and they stay folded under when not in use. It also came with two hard foam rods sewn into a tube with straps that you close the lift gate on for rear tie downs. Well I used them once and for the life of me I can’t find them and we are going out tomorrow so I made something that’s better. Better at least that I wont misplace it quite so easy. when I find the other ones we can use those for the other car.
Thought I would post a couple photos as this is a simple DIY project and you can save a few bucks. I used some 2” PVC as that’s what I had and some .25 strong line as I also had it around. Drilled 2 holes doubled the line and tied a knot that’s inside the PVC. 1.5” or 1” PVC would be fine. This is big enough when I hang it from a nail in the garage I will see it.
1 Like
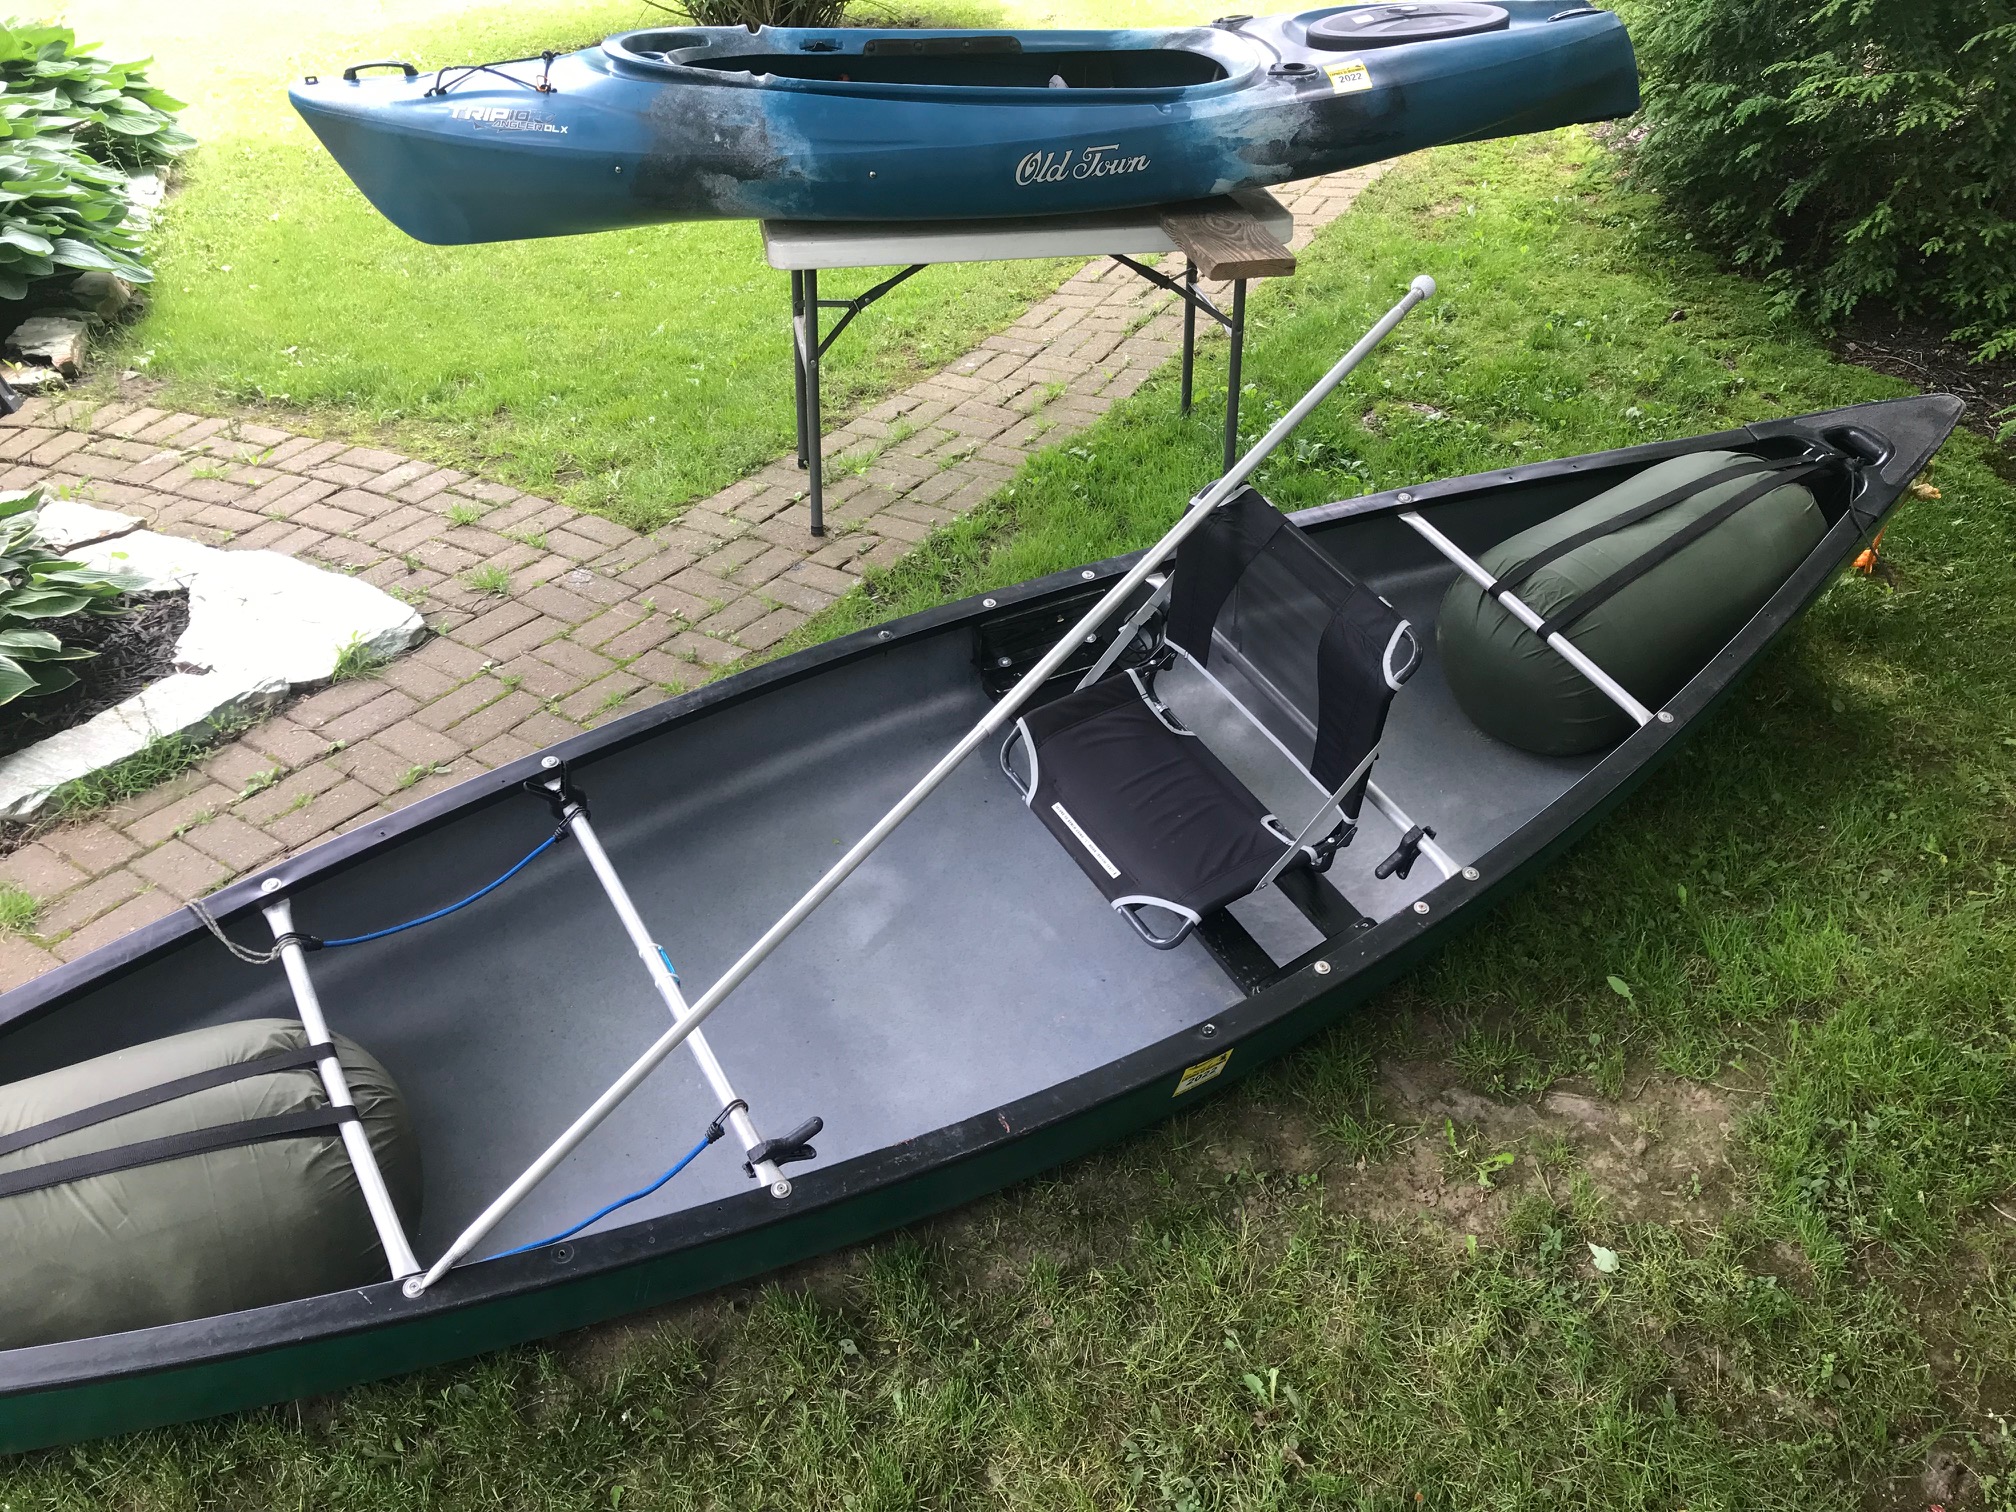
Well I had the reconfigured OT Guide 147 to use as a solo out for the first time two days ago. We took the Rec. OT Trip 10 kayak also. It was her first outing with the kayak as well with the added flotation.
We went to nearby Woodcock Creek Lake a dam near where we live and it is a good size lake and that day was perfect for testing the boats with wind. The water was a little choppy and there was a good wind coming from the west over the dam. We launched and went along the south edge of the lake into the wind. Previously she had borrowed a variety of cheap sit in rec kayaks and noticed anything but soft paddling would result in them spinning out on her. She was really impressed with both the stability improvement and the tracking and she commented on how she couldn’t over paddle the tracking but it also wasn’t hard to turn when she wanted to. So a winner on that front even with the wind.
My experience with the canoe not as good. Heading straight into the wind was fine until the wind switched a little and I was light in the bow and it wanted to turn me and the correction strokes I could tell were doing more to fight the wind than propel me. Even with turning the bow seat around and moving it forward about 8” I was still heavy in the stern. Not much but enough. I feel my seat location would be perfect with a camping load in the bow or a large dog even. Any passenger on the new mid seat I’m sure would do the trick as well. We pulled into a sheltered cove and the canoe was a breeze to paddle and I asked her to judge how level I was and she said bow up a couple inches maybe 3. I moved up to the front seat location that is now just in front of center and that brought the bow down and the stern up a couple inches and I took it back out in the wind and it tracked pretty well.
I know a lot of people paddle a tandem by sitting in the bow seat backwards and some say they add some ballast to the other end like a 5 gallon jug of water. I was off the hopes I could get by without the ballast in moving the seat a little but I think I might need more than a little. I’m 6’ and go around 240 so likely the extra weight is a factor over a lighter person.
I’m not ready to give up on the tandem conversion to a solo yet and I’m strongly thinking a seat location just behind center would be best and that would leave me cargo space in front and behind my seat so I could always trim the boat with the load I’m hauling. It would however take away my option for a second person at least paddling when configured like that. Although with everything done I could switch back and forth from solo to tandem in a half and hour if something changed and I needed a tandem.
So right now that will be a plan. Here is the best photo showing the weight distribution now. I have another light weight bench that holds a stadium seat back seat I will try it turned around and with the center thwart removed. I think I should be ok with removing it as the bench does the same thing.
By the way the stability of the Guide 147 is great it never felt the least tippy.
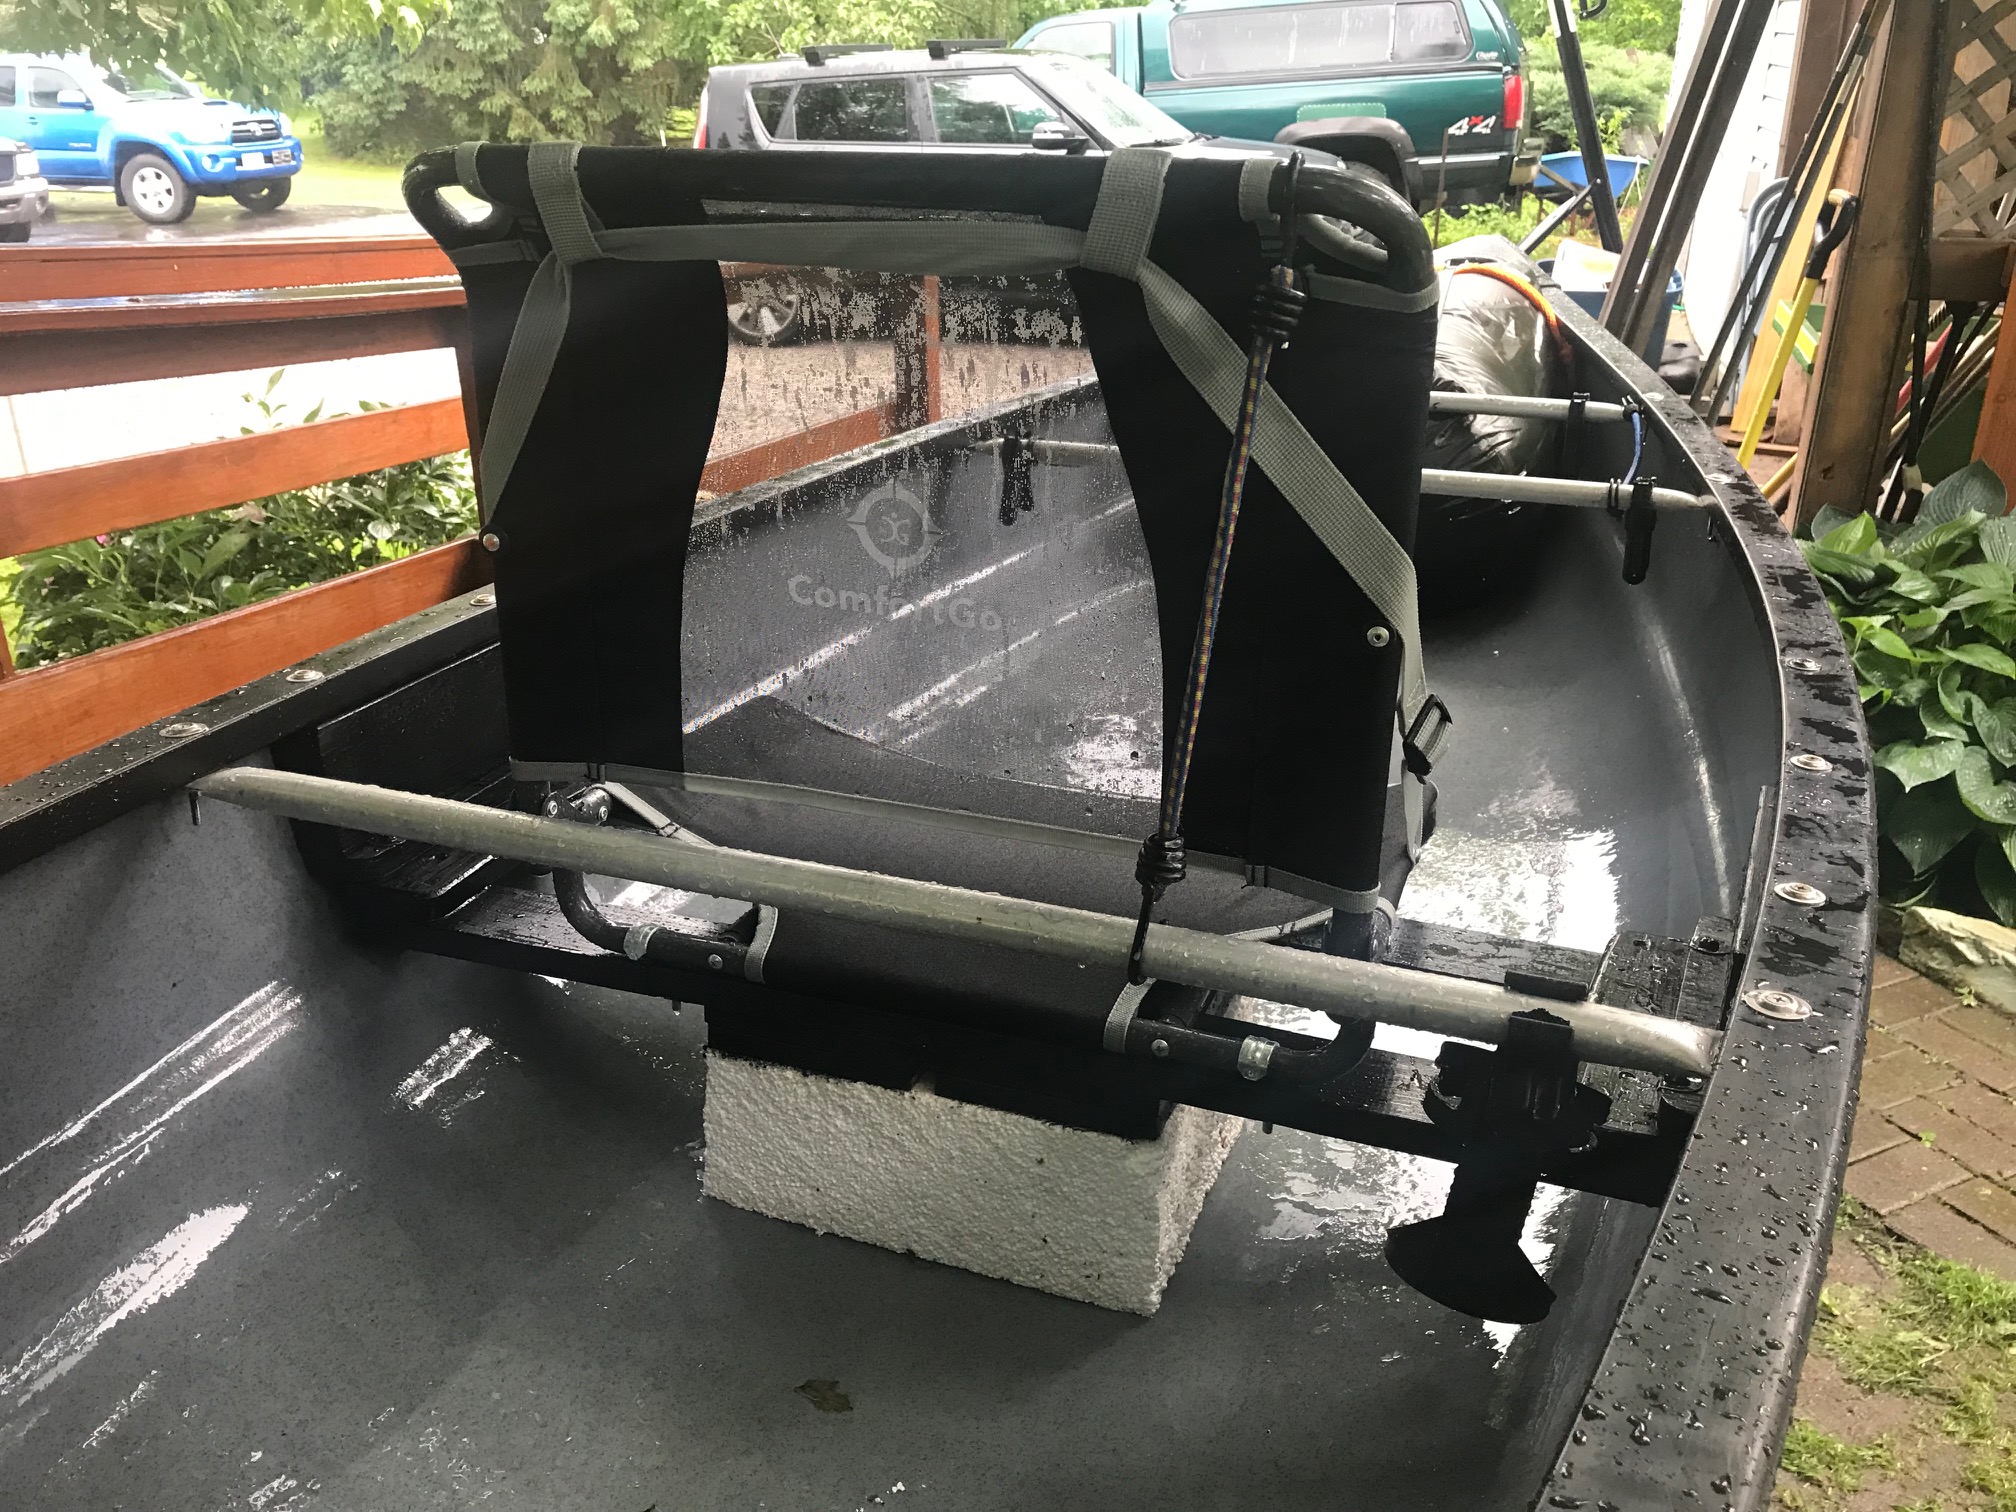
Version 2.0 We will see how this works? My guess from playing around the other day it will be better.
Right now the seat is 9” off the floor and the seat back is 18” behind the center of the length of the canoe. So my leg weight will be to the front and the rest of me right behind center.
I removed the center thwart but added 2 new ones that define the cockpit area. The cooler fit nice into the front 18” area and should be nice for keeping fish cold or food and drinks or both if I put a tub inside it to divide it, depending on the day it is easy to access there as well. There is a 24” area behind the seat for camping gear etc.
This mod is a true solo and I hope levels the canoe and helps with the wind by keeping more of the bow in the water.
I’m guessing but it feels a good 10-15 pounds lighter for loading. Way lighter than the blow molded plastic seats that came with it. I’m glad I got to try the formfitting seats IMO they were not that comfortable and were sweaty.
One thing for sure I need is a longer double ended paddle, or an extender for the one I have.
Update. Yesterday I got to try out the solo setup for the first time it was a beautiful day very warm and some nice wind at times. We put in to French Creek and took a leisurely 10-12 miles down stream in around 4.5 hours. I had stuff in the cooler mostly water for our group and the cooler and contents was about 15lbs. With me seated the boat was dead level and tracked better than any of the rec kayaks we were with. Amazingly the OT Trip 10 we got her also tracked exceptionally well compared to the other rec boats we were with when it came to wind. In my case it was night and day to the first outing we had where my trim was stern heavy.
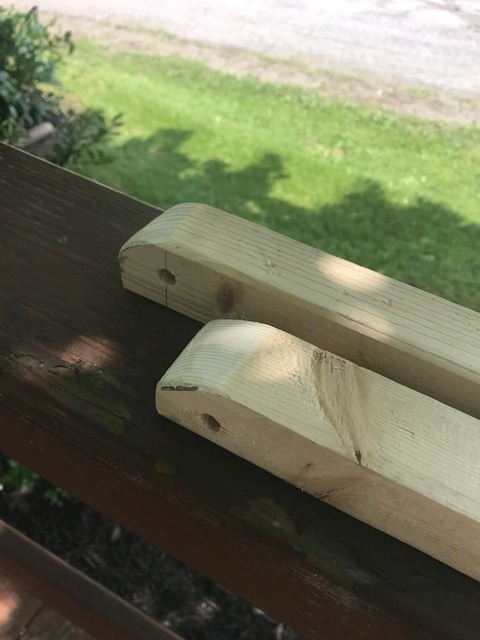
The creek was up pretty good and there were a couple spots where some of the bigger people were getting hung up and I actually drew less water than the kayaks so that was nice to know. At one stretch there was a shallow area where everyone had to drag their boat about 50 yards and I followed @daggermat advice and made an aluminum poling pole from a telescoping tent pole I had and I attached a golf ball to the end with epoxy that I drilled a 15/16” hole in to slip over the pole. It collapses to around 4’ and was in my paddle bag so luckily I had it in the canoe. When everyone else got out on the beach rocks to walk thru the spot I thought what the heck and I got out the pole. It worked pretty well and I was surprised my balance was pretty good and the canoe moved along great. So thanks for the tip. Don’t think I’m ready for whitewater poling yet but you never know. I will attach a picture of my pole with a golf ball handle.
The best part was being on the water on a beautiful day and looking up and seeing two bald eagles that circled us for a long time. We also saw a number of Great Blue Heron and numerous other bird. Fish were jumping quite a bit also.
When we pulled out I drug the canoe up a mud bank and put the dolly under it to the amazement of a couple young guys. When I got to the car I attached the ladder ramps and those two guys and a few others stopped and watched as I inched the canoe up and onto the car. At that point I heard several comments on needing to build something like that. We were loaded and gone in less than half the time of the other canoes that were getting wrestled up by two people instead of one.
Can’t wait for the next trip.
2 Likes
Nice, and isn’t it sweet what a great “messing about” boat a canoe can be? In and out of them easier, you can stand, kneel, sit, heck , even sleep in them…and yeah, more surface area, less draft, and the standing allows a better vantage point to find ways through the skinny stuff, as well as lets you see over the river bank.
1 Like
Yep I’m a believer.
When I first bought it off the neighbor I figured we would use it together as a tandem. I got it home and set it in the grass and tried each seat. I thought well the stern seat is really nice and I can see the whole boat and what is going on etc. Then I tried the bow seat and thought how cramped is this. About that time she tells me she is the type of person that wants to do her own thing on the water and wouldn’t be happy in a tandem. Plus she would much rather have a larger at least 10’ rec kayak over a canoe. I think she just knew her girlfriends all have rec kayaks and she wanted the same. So then I figured I’m stuck with a tandem and it didn’t have a seat to really solo paddle from. I thought maybe sell it and buy a single seat solo canoe, shorter and lighter. With a little trial and error it was pretty easy to get a single seat where I needed it and it became a pretty sweet solo canoe.
The only thing I didn’t mention in the last post is for sure I want to make 2 more changes. I want to raise the seat height 1” and I want to switch from a 230cm double blade paddle to a 250-260cm. Both those changes should compensate for the wide beam where the seat is now.
Even without standing the telescoping pole was handy when the boat needed a nudge. Plus in a pinch the pole and a tarp or GI poncho, some cord I have a makeshift tent. The golf ball makes a nice round end.
You mentioned sleeping, yesterday I pulled in under a big leaning shade tree and stopped there was a nice breeze and it was much cooler out of the sun and if I had an anchor I could have very easily taken a nap there.
Per the advice of @Celia in another thread I fashioned a foam block to go under my hanging seat and put force against the hull floor. The foam is under compression and attached to the framework that supports the seat back.
This area is also an area of the hull that wants to oilcan and stay hogged after a while. This seems to prevent that and it shares my weight now better between the gunwales and the hull.
I doubt it added more than a pound to the already heavy canoe.
It feels rock solid so far.
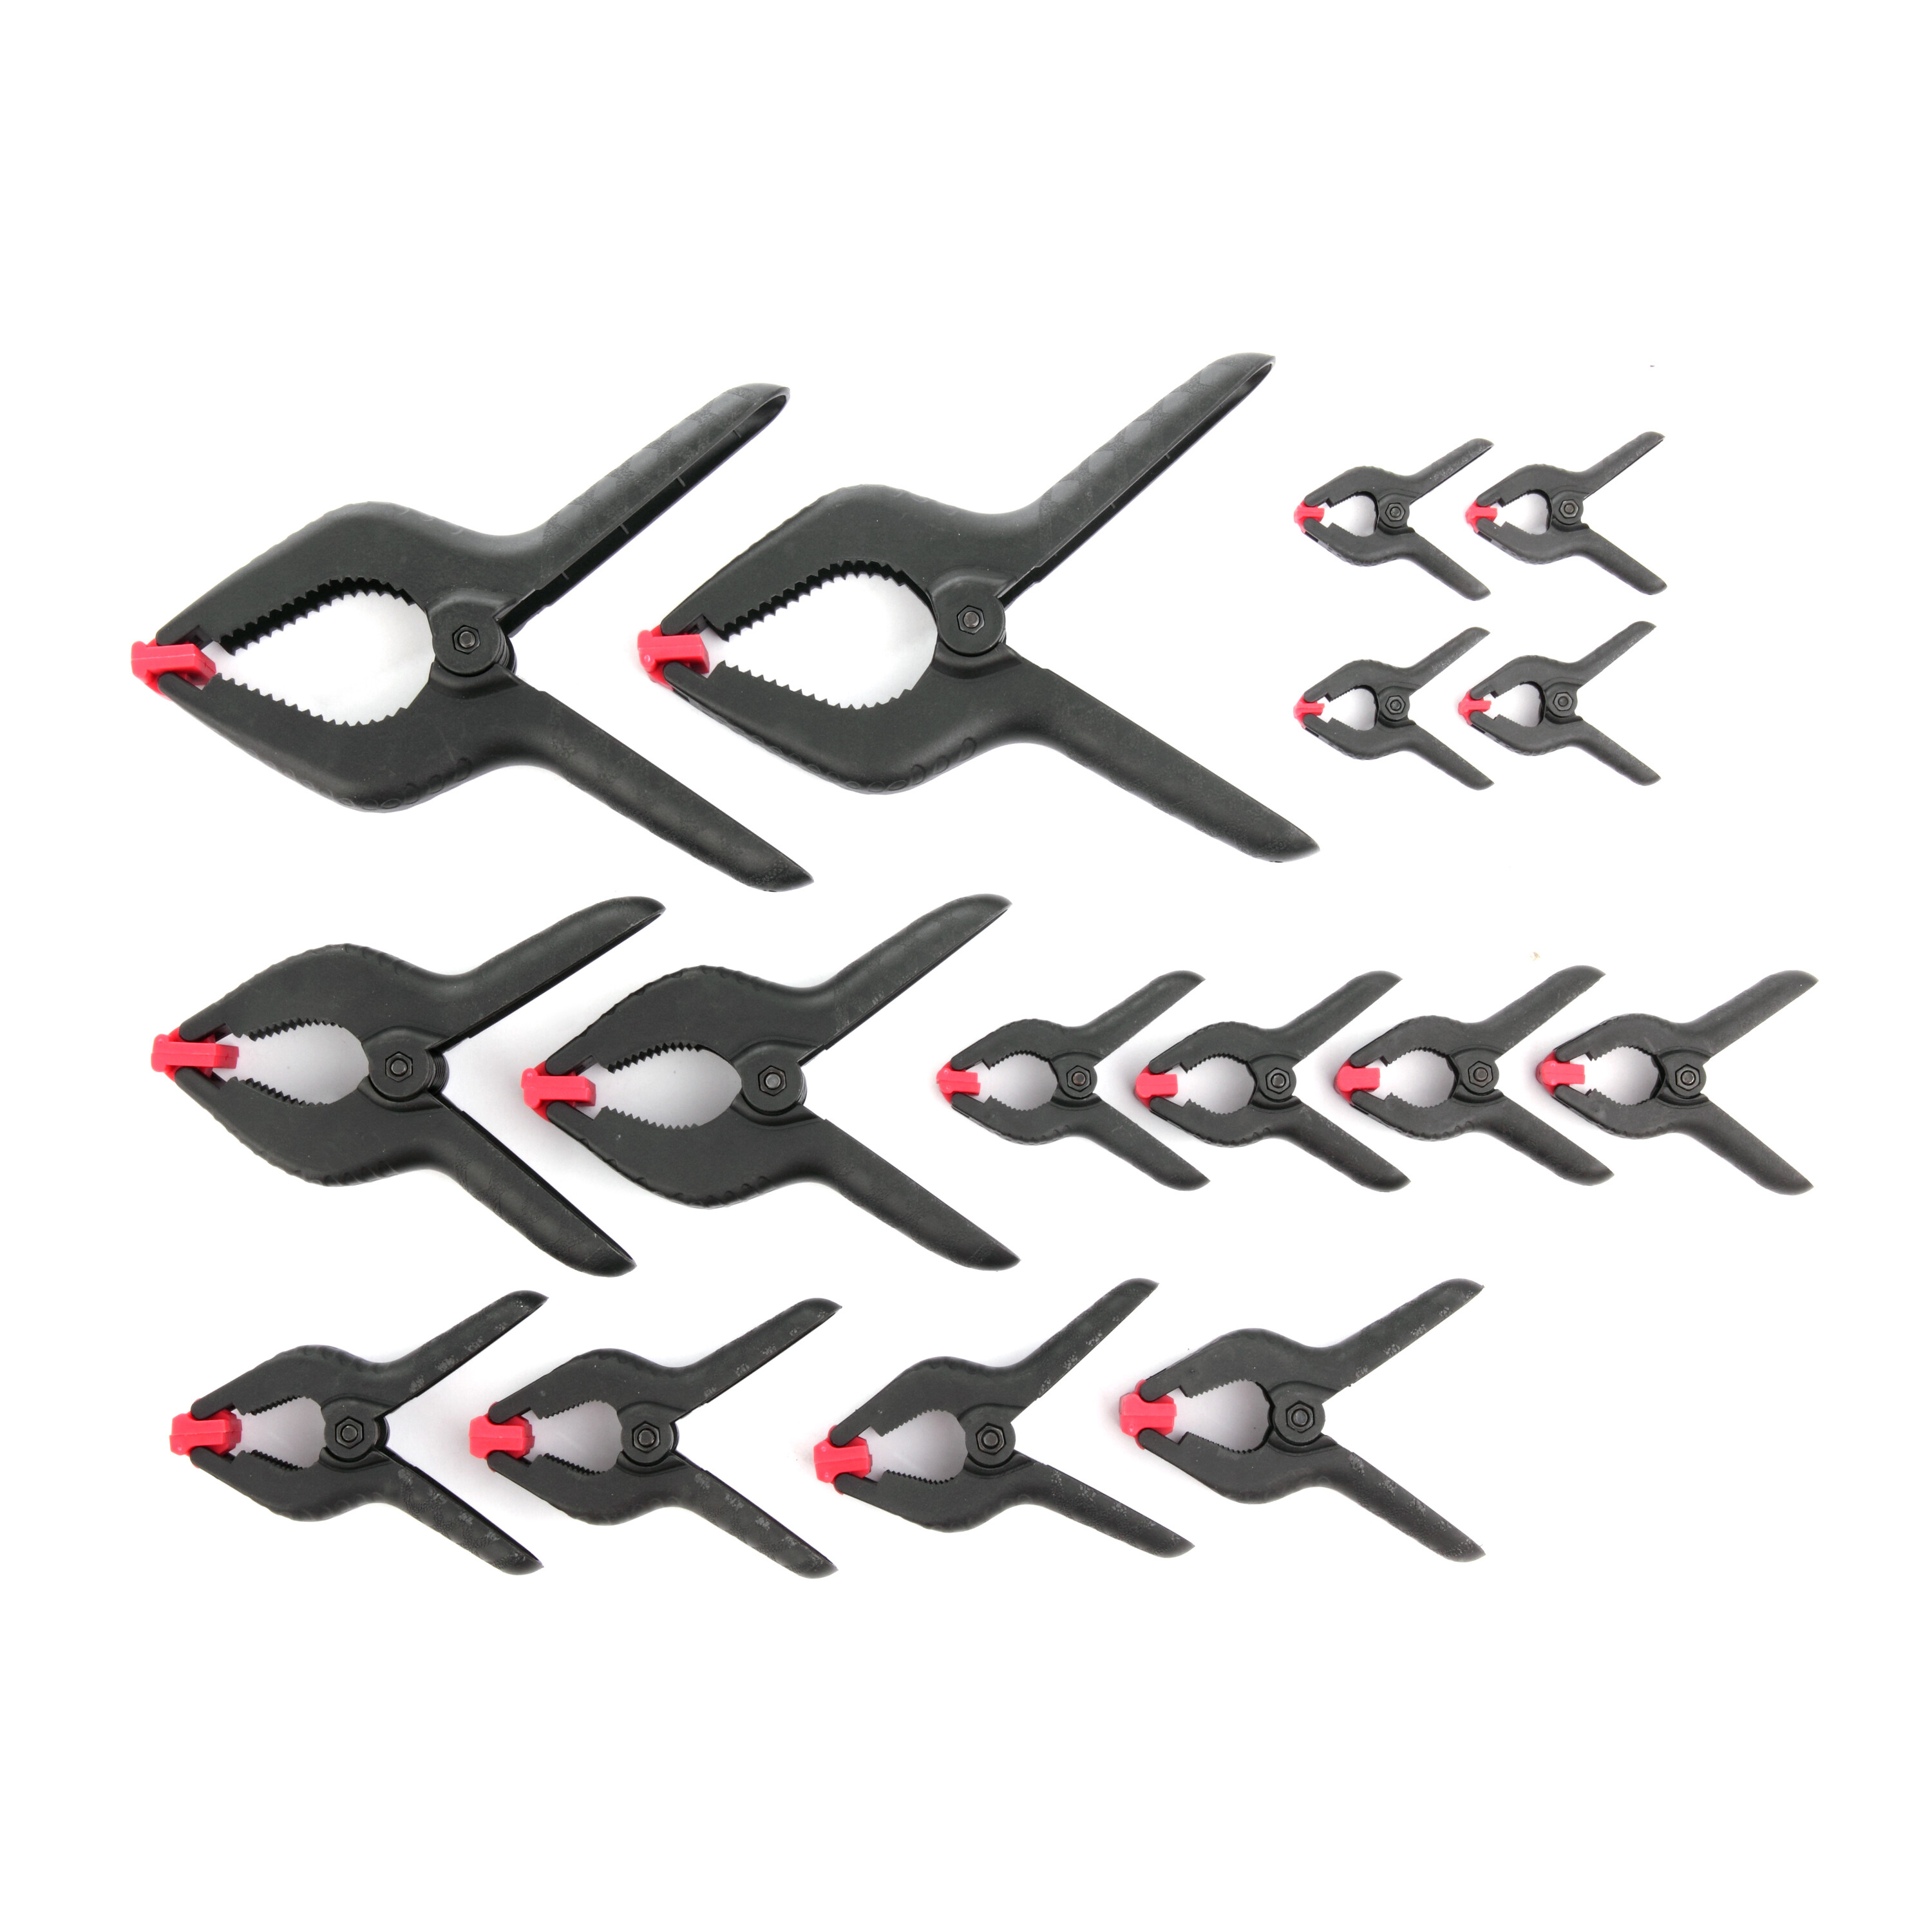
For $7.68 Walmart sells a bag of 16 plastic spring clamps.
I have been finding them quite useful on my canoe and thought I would make a post showing some of the things I have used them for.
I originally used them for a paddle rest by clamping 2 of them on a thwart and when I want the rest I turn them with the legs up to form a Y for the paddle to sit in. I sawed the ends off with the swivels and when I rotate them down they are below the gunwales and don’t interfere with loading on my car rack. I liked using them in front of me enough and I was looking for a good place to put the paddle when sitting fishing so I put 2 more on the thwart I added just behind my seat. It is pretty easy to lower the paddle behind my back and rest it in these.
Then I was looking for a handy spot for my best bilge pump that I will forget to take if it doesn’t live in the canoe. That same thwart right behind the seat seemed perfect and I took 2 smaller clamps and drilled a couple holes for zip ties and zipped them to both ends of the pump and then clamped the pump with them to the thwart. I can reach around and take it off in seconds when I need it and the rest of the time it also is below the gunwales and not going to shake lose on the road.
Lastly I wanted an easy to use fishing pole rest. I’m not a big fan of the poles sticking up in the air and when I get a bite I don’t want to have to pull the grip out of a holder to set the hook. I wanted the rods forward and low so if I had to paddle a little I won’t be snagging the lines and poles with the paddle. I took two of the large clamps and drilled a hole in each handle and ran a cord loosely between. I clamp them around the gunwale and to the hull and the cord cradles the rod and the grip sits on the frame of my seat. Sound travels from a boat to the water and the cord holds the rod but is silent when placing it down. I use a half-inch thick neoprene pad over the cockpit area for the same reason. When I’m not fishing I clamp them to my seat frame and get them out of the road.
The rest of the clamps will end up in my workshop as you can never have enough and who knows I might find more uses.
As an addition to the post before the one above where I added the foam compression block between the hull and the seat.
I found another nice benefit for having the hull firmed up at that location. That is the exact location where I sit the canoe on the transfer dolly. It always sunk in a little there when moving it and bouncing around moving it down uneven paths to the water made the hull flex in and out a lot. It has always popped back out ok when I take it off, but I have noticed a little hogging for a day or two where the dolly was. After the seat block that dolly clamps on like a rock and nothing is noticeably flexing.
Sometimes it is the little things. I store my canoe at least in the summer upside down on saw horses under a shade tree. When it rains the water runs off the hull and some seeps into the plastic gunwales fills them up and because of the curve runs down into the plastic decks and fills them up. When I tip it over it runs to the center and I end up holding it on edge for a few minutes to leak out and then once I flip it right side up more seems to run out. Then getting it on the car I make a mess of my shirt or something with trapped water. The other problem is my air bags are always a little damp from the standing water. Not that its hurting them but mildew will be starting.
I solved the problem pretty simply with drilling a drain hole in each end .25” is what I used. I tested it out with a hose and it drained every drop.
Just thought I would post this as it might help someone.
1 Like
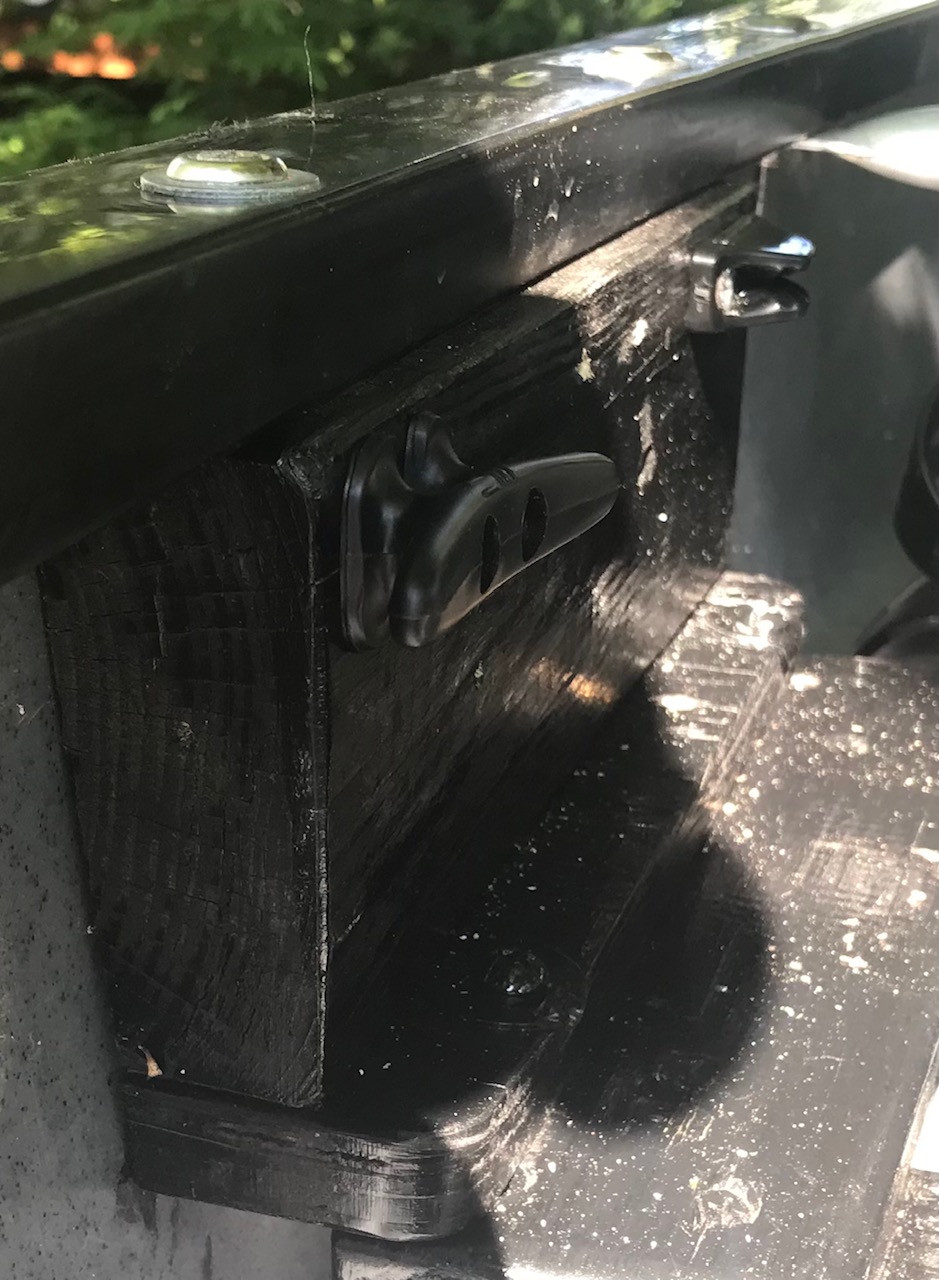
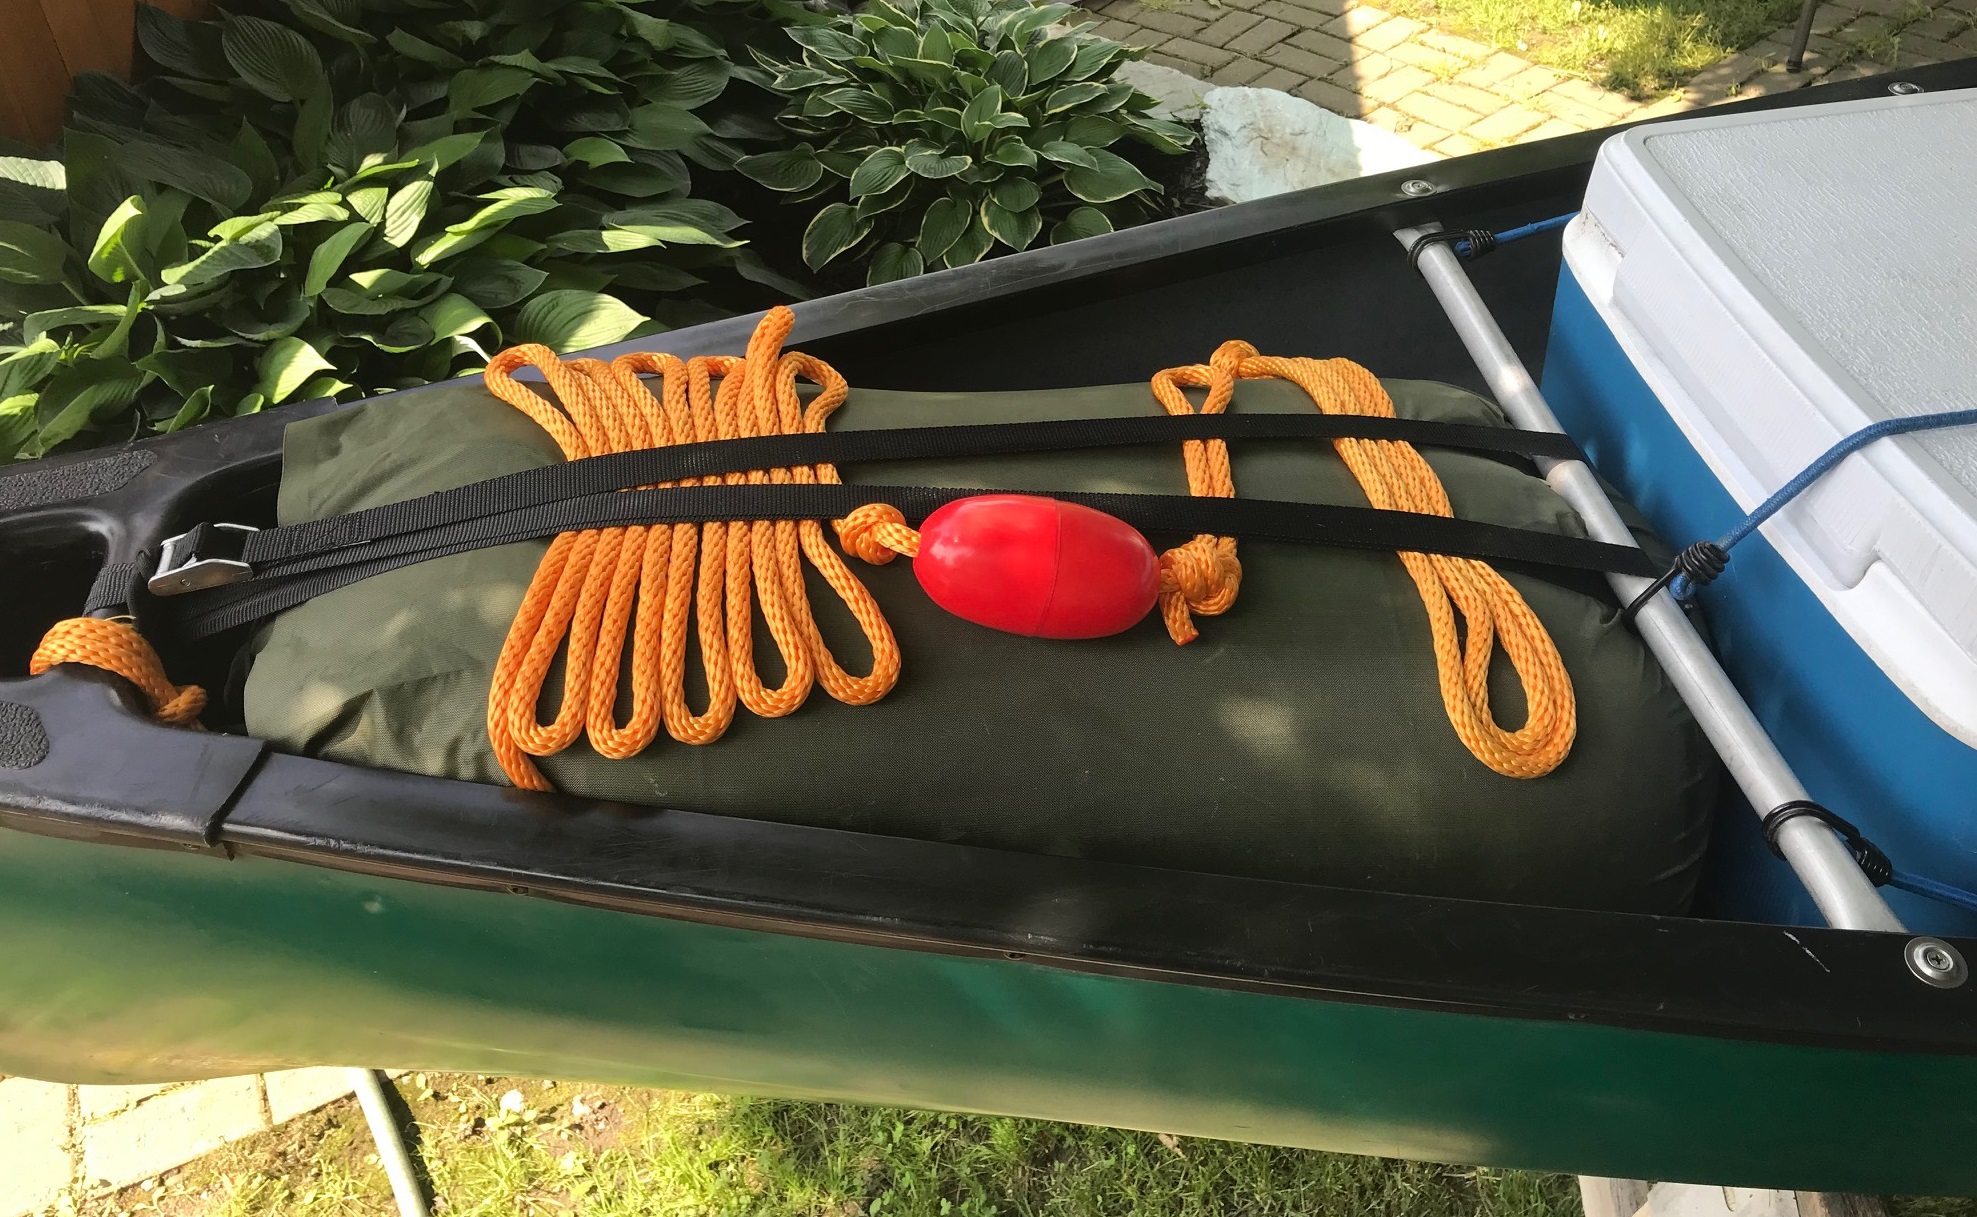
I have been reading here threads about adding an anchor to a canoe and watching vids on line trying to figure out what I want. The kayak came with a grapple anchor and a trolley rig for taking it to the stern but I wasn’t too impressed with that idea. One guy on line attaches his line to the bottom and then holds it to the top with a zip tie and if you get hooked to hard you will break the zip tie and pull from the bottom to get a release. I liked the sound of that. Lots of talk about keeping a sharp knife handy incase you get in trouble and others talked about a float so you can go back and get it after you cut the line.
I let all these ides stew in my head and came up with the idea to use two lines eliminate the trolley idea and run my anchor line thru my lining loop on the bow. I took the quick line grabber off the kayak and also the cleat and mounted them on the drop block I made between the gunwale and the seat support. That should be a handy place right at my fingertips to handle the lines.
The idea is before I go out I thread the anchor line thru my stern loop and set the anchor by my seat. When I want to anchor toss it out and it will be held at the stern loop keeping me pointed down stream. The second line will go out also but stays slack. I lock the main line coming from the stern into the quick line grabber and leaving slack in the bottom line I can use the cleat for that one. If I get in trouble I just let them all go and the bottom line has a red float. Once I’m ready to pull the anchor I use the bottom line and get both lines in the boat so I don’t snag something.
Right now both lines are longer than I think I need. Once I figure that out I will cut them shorter and figure out a good way to store them till needed.
Hope it works.
Just the small stuff again.
This morning I finished off the Folgers and was getting ready to take the can out to the shop when I thought I bet the anchor and lines will fit in this. Attached a bungee to it and it tucks in right next to the seat. Now if I’m fishing I toss the can in the car and I’m ready otherwise it doesn’t need to clutter the canoe.
Next little project is come up with a way to lock the cooler lid down. Will post a picture when I figure it out.
Then I’m about done and time to stop fooling around and spend some days on the water having a good time. 
Well I’m just about finished with this thread for now. It started out as my second post here and a way for me to document the steps and re-steps I took turning a double into a single for the most part. As it went on it was that plus what I was learning along the way with all the steps of getting two boats from point A to point B and back again using what we had available and not spending a lot in the process. As of right now and hopefully for a while we will be happy with my converted canoe and her lightly modified rec kayak.
I was interested in safety first in loading and transporting and also using the boats in the water. We are not planning anything too wild sightseeing some fishing and doing river floats together and with our friends.
I have done quite a bit to both boats with adding what I feel is adequate floatation to both boats based on our usage and we have learned enough to know reentry into ether boat in deep water even with practicing is not going to be easy for us. For that reason we will be avoiding crossing larger bodies of water where swimming a boat in with the assistance of the other would be more than we feel ok with.
I did have an idea for a reentry aid and I made a mockup of it the other night and posted the idea in a thread dealing with deep water reentry and it didn’t render any comments. So I thought it better to post that information here so in the future if I need to relate to it if it works or advice people not to try it if it doesn’t work I can do that in my own thread. Now if it did work well maybe then I would start a thread.
The idea is for a two boat rescue and I’m basing it on our two boats as we will often be out together. The common method is for the second boater to get alongside the boat being entered and weighting the far side with their body to help stabilize the other boat enough for the swimmer to get up and in with or without a stirrup attached to their boat in some way. My idea is a stirrup that crosses the boat being entered and hooked to the coaming or gunwale of the other boat so the swimmers weight gets transferred pulling the boats tight together and also putting the weight of the other boater and their boats weight down to prevent flipping the boat being entered. I put our two boats side by side on saw horses and tested the idea a bit and took some photos I will post. on the horses it looked like it did what I wanted as even without another person in the other boat I was able to put a lot of weight on the stirrup without the canoe wanting to rock or flip up. Of course water will factor in greatly and I hope to get out and test the idea soon. We are good size people I’m 65 with bad knees so if it will work for me it will work for anyone.
Here is what it looks like.
I have also gave a lot of thought to bow and stern painter lines and what I will use them for on the canoe and what she will use just a bow line for on her rec kayak. I had been attaching mine to the grab loop on each end and I do believe that is the correct place to have them attached in many ways. We are not doing white water and ours will mainly be used for tying the boats up to shore and dragging the boats over banks and such to enter and exit the water. We will also be using them for lining thru shallow areas we may encounter. If we do unintentionally go for a swim we wont be in a situation that demands us to grab a painter line before we lose the boat to the current. On the other hand we may be using them to swim a boat to shore or the other tow our boat in to aid the swimmer. Maybe even tow the boat and the swimmer in.
I didn’t like the idea of getting the painter snagged when on the river with having it attached to the loops. So in our case I felt they will do fine attached higher to the carry handles bow and stern. If it looks like some particular task I will ask from them would be better pulling lower at the grab loops it only takes a minute to switch them. so here is kind of how I have them for now. the stern one once I get the canoe in the water I have been bringing up to beside my seat. If I jump out quick for any reason it will be right there to grab and pulling on it will let out the line.
Added a float to the rescue sling. Wouldn’t be good to be in the water and need to get into the boat and have the rescue sling sink. Put it in a zip-lock and will have it attached right beside my seat for quick access.
Anyone following along on the canoe loader I showed in post 19 I made a few minor improvements to it that make it much better in big ways.
I ended up not needing all the blocks I started with and removed the upper 3 that caught the upper gunwale as the lower 3 can do double duty switching from the upper to the lower once you get 3 steps up. In using it I stand between the car and the canoe and pull it up a couple steps. Then I duck under the ladder and come around and stand between the poles and push it the rest of the way up. I was alternating ends but going straight up is easier.
At the top the corners of the poles stuck up higher than the racks and I rounded those corners so now it slides right up. I also changed the rectangle step/blocks so that the down side has a 45 degree ramp. Now when I’m pushing up nothing can catch the gunwale slides up and over each block and only latches in the down direction.
I also saw an ad for something almost like this. Quite expensive and didn’t look as smooth to operate.
The fruits of my labor are paying off I guess. The night before last I loaded up both cars and loaded both boats on the haul car and brought the cooler inside to put some stuff in the next morning. In the morning we had a nice breakfast at home loaded up the cooler with lots of water few snacks and a couple sandwiches, as they were predicting a hot one. Put on some sun block and drove to the put in near our house on French Creek in Cambridge Springs. We dropped off the boats and got asked questions from a couple guys there. One guy loved the idea of a wheeled dolly and when he saw me place the rec-kayak on top and roll them both down to the ramp with just one hand he was sold. The other older guy was very interested in the canoe ladder loader and then when he saw we both had extra floatation added to both boats he had more questions. We left the boats and shuttled the cars to the take out near Venango. Only 15 minutes by car. We returned to the boats loaded some gear and set out. French Creek has some remote areas but is mostly over this section followed by roads and there are homes and cabins here and there. We got to where Conneauttee Creek enters French Creek and decided to head up Conneauttee as I was told you could go a mile or so without too much trouble and then there is a beaver dam to cross if you want to go further. We thought we would just go to the dam and turn around. This was our first try at a small creek and this one meanders and takes many paths and joins another Little Conneauttee that also travels many paths. We have known these creeks our whole life as where they cross roads and such. We were not ready for the beauty they presented though and the truly away from anyone setting. We saw Beaver and Muskrats birds of all types including Bald Eagles, Butterflies and we came quietly around one bend to come face to face with a White Tail and her Fawn. We turned around at the dam and headed out spending a little over an our up there well worth the detour. Back on French Creek again we paddled another hour and found a shady spot and rafted up and had lunch and a cup of coffee that had never tasted better. We didn’t see another boat the whole day and only a couple people swimming off their dock that we chatted with a bit. We were on the water about 6 hours loaded up and headed home after a perfect day.
The OT canoe mods had me tracking great and we had a head wind almost all day to the point some places the wind canceled the current. The only complaint I have now is the 230cm paddle is too short and I’m thinking 250-260 is needed with this width of canoe and slightly lower seat height.
I also couldn’t get over how good her OT Trip 10 tracked and how well it glided thru the water. It was easy to see even though I did fine with the wind it was almost a non factor for the kayak. I know others call these bathtubs but I watched it split the water all day with hardly a ripple.
Many times I have read a slight hog to a canoe or kayak hull is cosmetic and doesn’t change the function. I have to disagree. When I worked the hog out of the canoe leaving the bottom mostly flat I saw some improvement. And then when I added the foam block under pressure below the seat it gave that flat bottom just a slight crown of maybe an inch or so. I can tell the secondary stability is a tad less, but at the same time it feels more stable with tracking and easier to paddle. Nothing huge but compared to an indent pretty noticeable.
I realized from another thread I posted to that I hadn’t posted any loaded pictures on the car with all the final changes I made to the rack and rigging so I will stick them in. Right now we seem to have it down to somewhat of a science and we both know what straps go where and we can get them on and off like we know what we are doing. The long extensions will hold 3 rec-kayaks or two canoes etc. The ends are painted blaze orange and yesterday was the first time I didn’t bang my head getting in or out of the car. Hopefully others walking past the car will not also and I only have them on when the boats are being used.
Looking forward to exploring more area rivers, creeks and lakes within an hour or two of home the rest of the summer.